


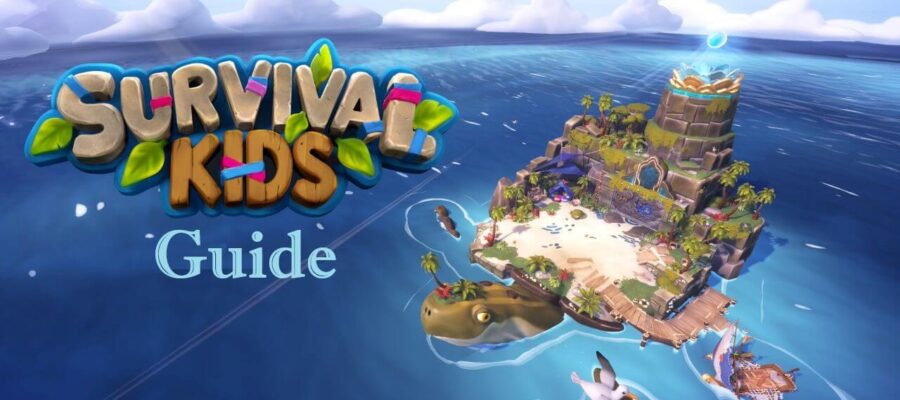
Survival Kids is a level-based, collect, build and escape adventure, exclusive to the Switch 2. The game scored our highest rating, and you know our motto: when we love a game, we try to make a guide!
So here it is: the Survival Kids Guide! Helping you collect all the treasure stones and glyphs. Happy exploring!
Survival Kids Guide – Table of Contents
Struggling with just one island? Can’t find the last treasure stone or glyph? Go directly to the island you need:
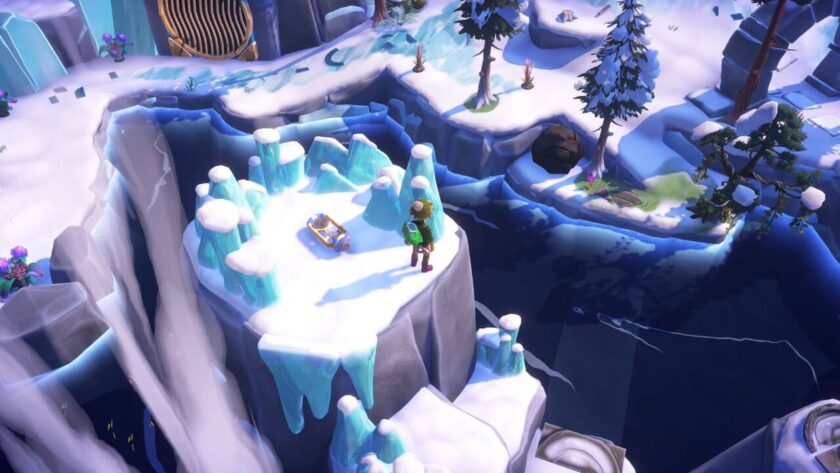
Lesson Lagoon
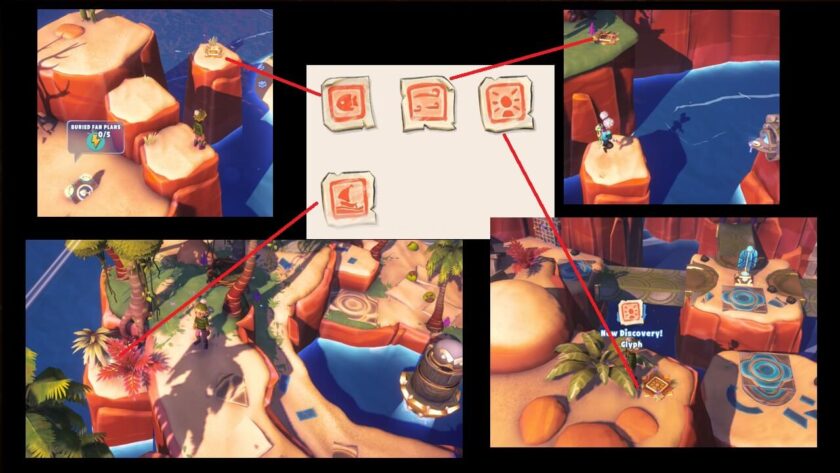
Fish-a Lot Island
Springy Shores
Wind Cove
Boom Flower Bay
Towering Sands
Splashdown River
Gliding Tides
Fly Bye Island
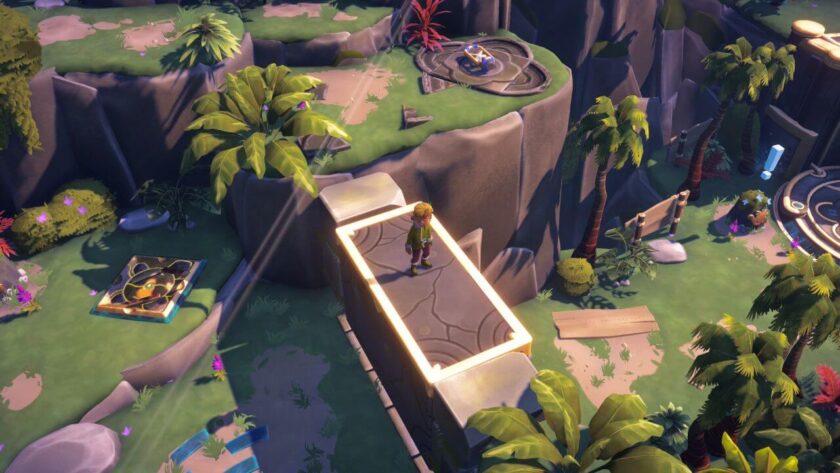
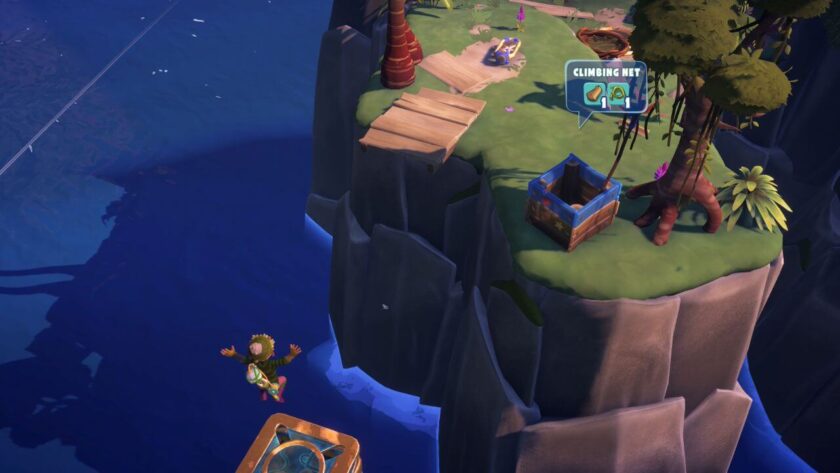
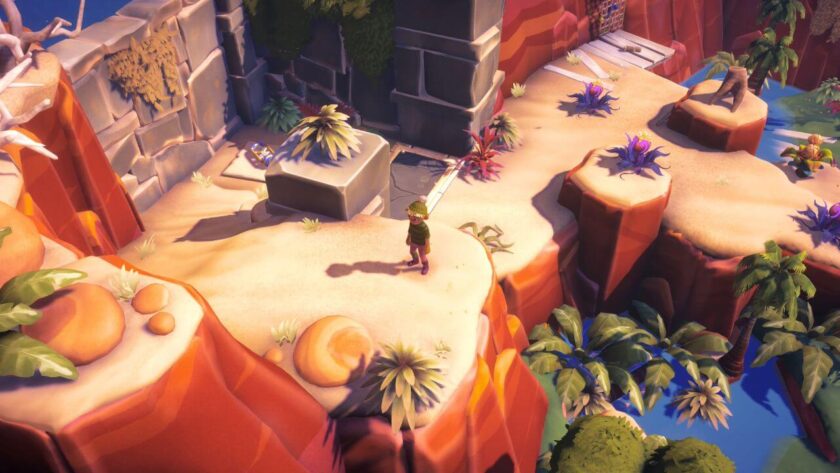
Lesson Lagoon
Treasure Stone 1:

This first treasure stone forms part of the learning experience in Lesson Lagoon. Once you’ve built your base camp and the climbing net, you will easily find the stone. Build the bridge to get the treasure stone back to your base camp.
Top Tip: If you’re looking for speed rather than treasure, then you don’t need to build the bridge.
Treasure Stone 2:
As you continue to explore, you’ll find the path blocked with a wall. You need to use the wall as an elevator, as the second treasure stone is on the cliff above.
Top Tip: Your character and three items will weigh enough to lower the wall, but it will rise again as your character jumps to get onto the wall. A tree trunk is too heavy, and the wall will stay lowered.
Treasure Stone 3:

The final treasure stone is found en route to collecting the sail. As you get to the top of the island, there are various column ruins. Use these to jump to the upper level.
Glyphs: There are no glyphs in Lesson Lagoon.
Return to the Table of Contents
Fish-a Lot Island
Treasure Stone 1:
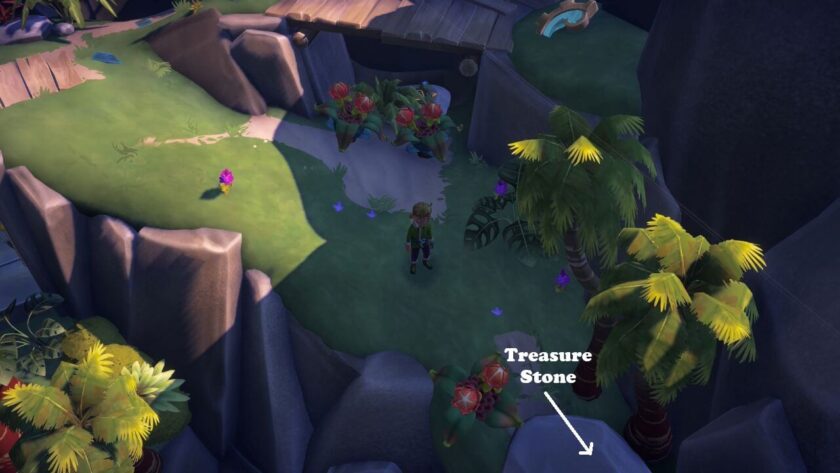
The first treasure stone is located near the buried gear piece, just carry on further down the hill.
Top Tip: You don’t need to carry the treasure stone all the way back to the base camp, if you haven’t moved it yet. Place it on the elevator and complete the task at the next base camp.
Treasure Stone 2:
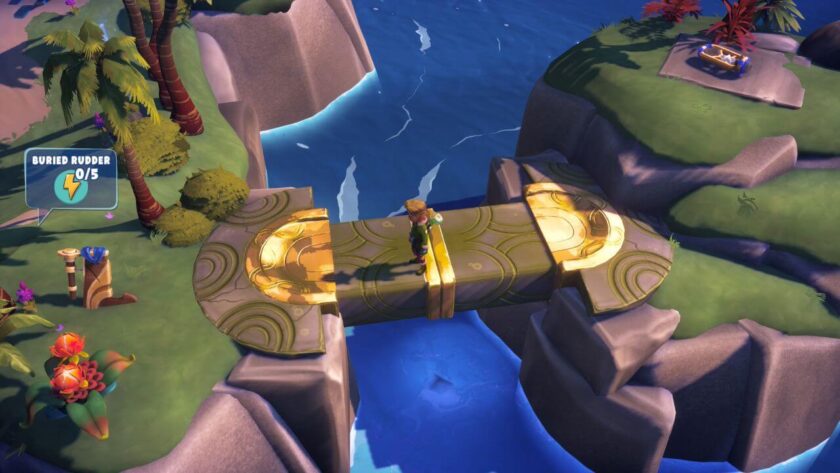
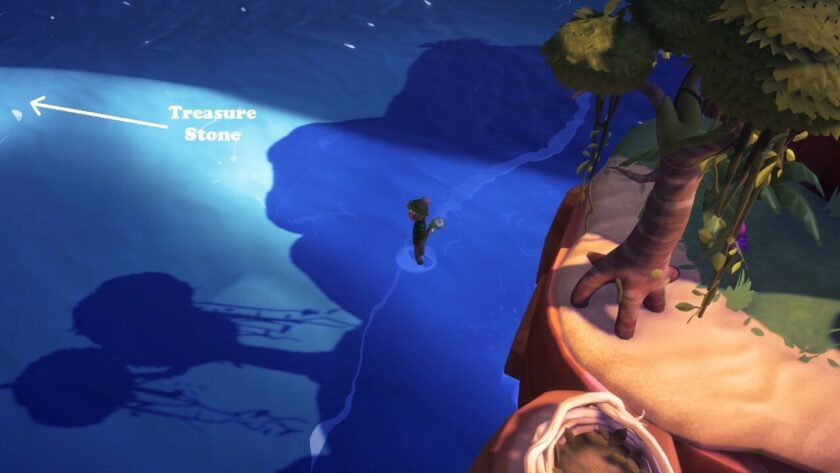
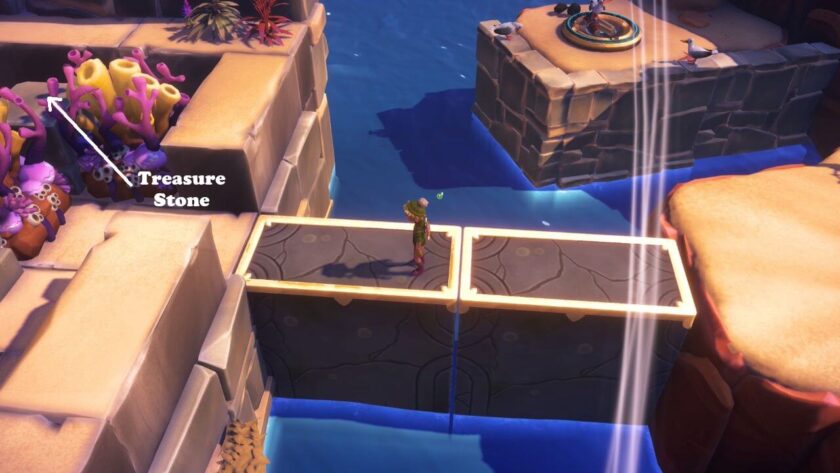
To the south-east of your final base camp, you’ll find a Whurtle head statue. Use your fishing rod to reveal a bridge. The second treasure stone is on the little island, near the buried rudder.
Treasure Stone 3:

The final treasure stone is located on a small island to the west of the raised staircase needed to get the sail. Drag the stone close to the edge and then use your fishing rod to grab the stone from the island.
Top Tip: Holding items limits how far you can jump, so throw or use the fishing rod to get logs and vines from the island to build the climbing net.
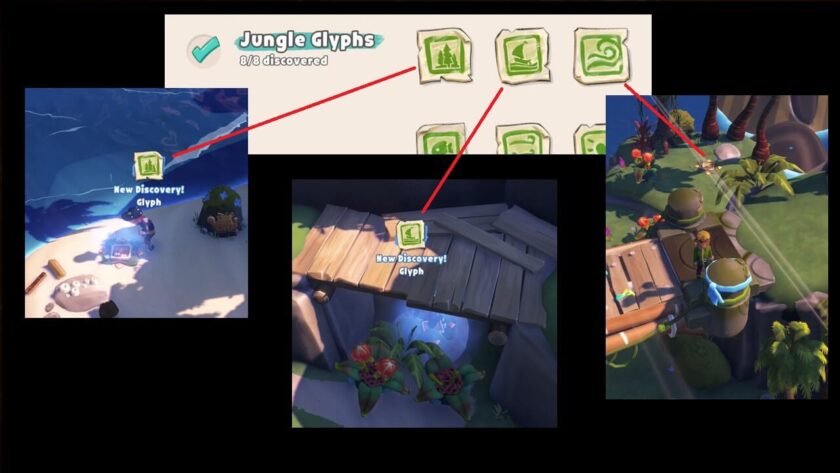
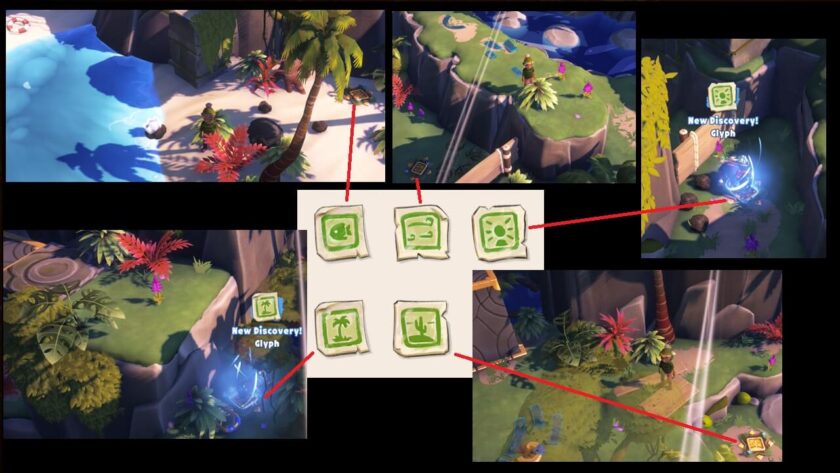
Glyphs:
Glyph 1: To the west of where you wake on the island, next to the information stone.
Glyph 2: Is under the bridge, near the buried gear piece.
Glyph 3: Is in the area towards the Whurtle’s neck. Go west and then north from the final base camp. You can see it from the top of the climbing net, where you build a bridge.
Return to the Table of Contents
Springy Shores
Treasure Stone 1:
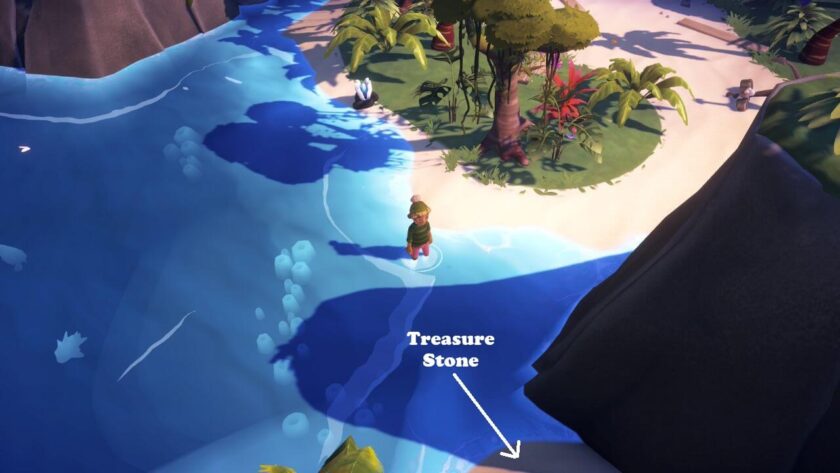
The first treasure stone is located on an island to the south of where you wake on Springy Shores. You can walk through shallow water, denoted by a pale blue sea.
Treasure Stone 2:
The second treasure stone is on top of a rock just east of the second base camp. You’ll need to use the trampoline to gain enough height.
Top Tip: You can throw a log or rock at the ancient turret to confuse them for a few moments.
Top Tip: Take the trampoline onto the elevator before dragging it onto the base camp. This saves having to find the plans and make another one later.
Treasure Stone 3:
The final treasure stone is on top of the rocks above the climbing net.
Top Tip: You can throw items whilst bouncing on the spring.
Top Tip: If you’re looking for speed rather than treasure, then you don’t need to build the climbing net to find the raft parts.
Top Tip: Use the fishing rod to pull the rudder up onto the higher ground near the spring, rather than dragging it over the bridges.
Glyphs:
Glyph 4: On an island to the east of your first base camp, through the shallow water.
Glyph 5: Down a dead-end path near the first ancient turret.
Glyph 6: Under some rocks, just south of the second base camp. You might see it as you jump to recover the trampoline plans.
Glyph 7: Located at the bottom of the lift platform area, which you find when you follow the climbing net route for the third treasure stone.
Glyph 8: Located below where you find the rudder. Check under the coconuts in the little hollow.
Return to the Table of Contents
Windy Cove
Treasure Stone 1:
Build the pier first and make sure you have your fishing rod. West of the climbing net, on the raised area with trees, you will notice that the water is slightly paler. You can walk through this shallow water to get to a small island where the first treasure stone is located. Use the Whurtle head statues to raise platforms to get back to the mainland.
Top Tip: You’ll need increased stamina to get the buried gear piece, catch two or three similar fish, as that only means one trip to the cooking pot.
Treasure Stone 2:

After climbing to the elevator, raising the platform, and activating the pressure plate, you can use the rocks to the side to climb higher up. The treasure stone is at the bottom of the path, behind the rocks.
Top Tip: If you still have the fan on you, then you do not need to make camp on this second level. Take the treasure stone onto the elevator and add it at the next camp.
Treasure Stone 3:

After you’ve activate the bridge to recover the sail, drag the trampoline up the little path you used to activate the spinner. This will enable you to bounce on top of the rocks and jump your way across to the treasure stone.
Glyphs:
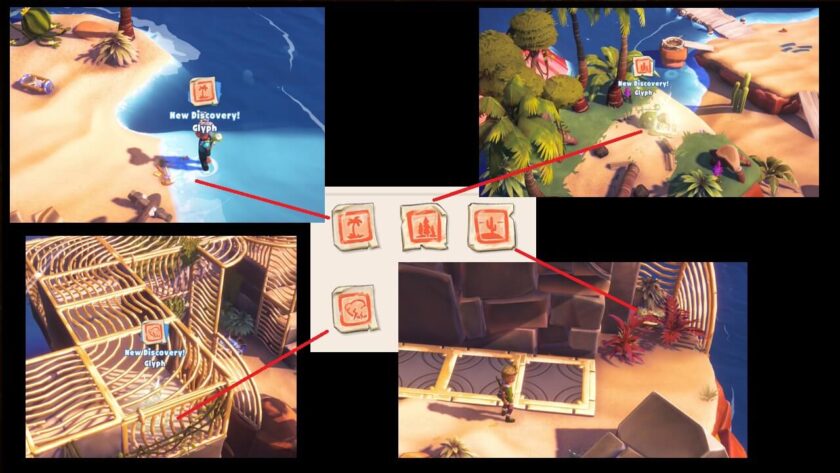
Glyph 1: You’ll find the first glyph, when you recover the first treasure stone. It’s on the little island, at the end of the shallow water path.
Glyph 2: On the hill top, near all the trees, to the south-west of your first base camp.
Glyph 3: Go to the east side of the second area after you’ve activated the bridge via the spinner.
Glyph 4: You’ll need to drag the trampoline to the exit of the caged area to get the fourth glyph.
Return to the Table of Contents
Boom Flower Bay
Treasure Stone 1:
The first treasure stone of Boom Flower Bay is located in a walled area to the southwest of the climbing net. The pressure plate to activate the wall is located in the pond below.
Top Tip: Gather lots of food items near the cooking pot before you start cooking, so that you can add more in one go, making hearty meals, rather than light snacks.
Treasure Stone 2:

The second treasure stone is behind the second coral wall, near where you find the plans for the fan. It requires picking, throwing and blowing a boom flower to break the coral.
Top Tip: Remove the desert radish plants, so the boom flower gets to the coral wall more directly.
Treasure Stone 3:
You’ll notice a pressure plate in an area behind the raft. Once activated, the pressure plate will raise a pathway which leads to a boom flower maze. The treasure stone is located in the top left corner.
Top Tip: You might be lucky throwing and blowing items onto the pressure plate, but it’s easier with the cannon.
Glyphs:

Glyph 5: Located on a rock bridge to the east of the base camp. You might have seen it as you were walking around the beach below.
Glyph 6: Right next to the elevator, when you go further up the island.
Glyph 7: To the west of the final base camp, on a small island.
Glyph 8: Under some bushes on a small raised area, along the path which leads to the sail.
Glyph 9: On the floor of the boom flower maze, near the last treasure stone.
Return to the Table of Contents
Towering Sands
Treasure Stone 1:
The first treasure stone is hiding behind the second movable platform, controlled by the slider.
Top Tip: Collect the treasure stone as you take the base camp to the elevator, rather than having to move the slider too many times. You’ll need to raise the platform slightly, so you can drag the treasure stone on to it.
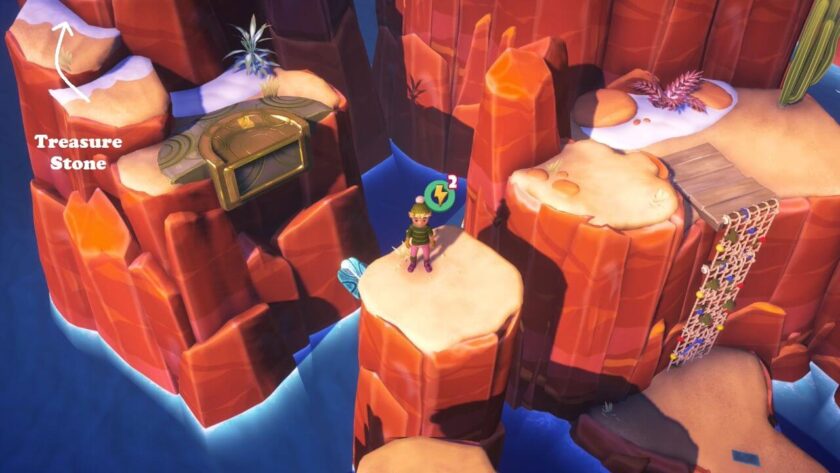
Treasure Stone 2:

This treasure stone is hiding down the cliff path. You will need to drag the trampoline back to where you found the plans and then launch yourself up onto the cliff.
Treasure Stone 3:
The final treasure stone is at the very top of the Whurtle. After building the climbing net to get to the sail, go west and jump around the snow-covered mountains. You’ll need the fan to activate the first platform.
Top Tip: When gathering the resources for the climbing net, try going around the ancient turret anti-clockwise and back over the bridge you built.
Glyphs:
Glyph 10: On a tall rocky outcrop, near the buried fan plans.
Glyph 11: To the north-east of the base camp, on the grass beneath the trees. You will see it when you activate the Whurtle statue.
Glyph 12: On the cliff near the spinner, which activates three platforms. Once you’ve built the climbing net, jump south onto the rocks to get the glyph.
Glyph 13: The final glyph is hidden in the undergrowth west of the ancient turret, just off the path which splits into a high and lower level.
Return to the Table of Contents
Splashdown River
Treasure Stone 1:
The first treasure stone is to the south on a ledge above the base camp. Glide round the edge of the camp, starting from the gear part (which is not buried).
Top Tip: When starting Splashdown River, throw items into the bridge collection box from the same side, avoiding the ancient turret’s shots.
Treasure Stone 2:
The second treasure stone is above the second base camp to the east. You might have seen it, as you entered the area. Use the springs to bounce your way up there.
Treasure Stone 3:
The final treasure stone is near the Whurtle’s head, high above the final base camp to the west. Equip the umbrella and jump your way up from the far end of the area where you found the prow, and then glide carefully around the mountain paths.
Glyphs:

Glyph 1: South of the first base camp, near the vine tree.
Glyph 2: On a rocky ledge, near the sluice gate. You will land on the ledge as you glide back to the second base camp
Glyph 3: On the edge of a mountain, which you will find as you travel to the third treasure stone.
Glyph 4: On the rocks to the side of the climbing net, built to get to the sail.
Return to the Table of Contents
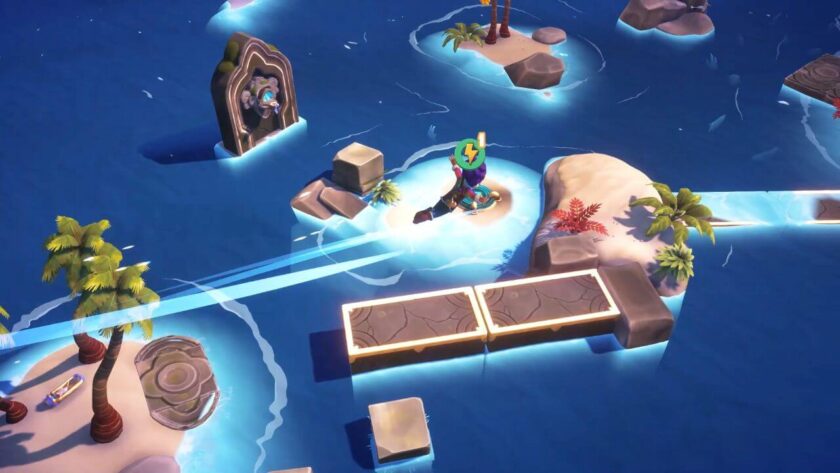
Gliding Tides
Treasure Stone 1:
From the base camp, head back through the arch, you’ll notice a carved stone plate. With the umbrella, you can jump across and use the updraught to get to the top. You’ll need to activate a pressure plate (located inside the tree trunk to the south of rocky hill), to reveal a pathway back to the base camp.
Treasure Stone 2:

The second treasure stone is located on an unseen area south of the fishing rod plans mountain. After the first glide, climb up the mountain then jump, gliding south, and you should see a wooden platform.
Treasure Stone 3:

The final treasure stone is on the cliff to the south of the final base camp. However, it is too high to use the trampoline. You’ll need to glide your way around, starting near the two bridges you built in the west.
Glyphs:

Glyph 5: You’ll probably find this as you look for resources to construct the large bridge, it’s on the rocky hill to the east of the first base camp.
Glyph 6: Balance carefully as you make your way across the top of the wall, near the elevator.
Glyph 7: You’ll find this glyph at the bottom of a slope near the updraught grate.
Glyph 8: When you find the pressure plate which releases the prow, continue to explore. You’ll find a boom flower and carved stone plate. The glyph is hiding under the coral wall on the opposite cliff.
Glyph 9: As you journey east, in search of the sail, you’ll find a spinner which extends a bridge. The glyph is on the island near the ancient turret.
Return to the Table of Contents
Fly Bye Island
Top Tip: Getting the sail: There are stones at the top of the caged area, which can be used on the pressure plate. Once the sail has been released from the pit, remove the items from the pressure plate, so that the ancient turrets no longer shoot at you.
Treasure Stone 1:
The first treasure stone is found in the waters west of the base camp. Use the glider to get to the rocks just off the stone jetty, then use the fishing rod to get the treasure stone back to camp.
Treasure Stone 2:

The second treasure stone is found near the Desert Whurtle’s head. You need to use the second ice super cannon to get there.
Treasure Stone 3:

The final treasure stone is found on a snowy hill on the Ice Whurtle. However, you get there by launching yourself into the second desert super cannon.
Glyphs:

Glyph 1: Located on the island with the Whurtle head statue, southwest of the base camp. It’s easy to get once you have the umbrella.
Glyph 2: Located on the ruins to the east. Use the fan to raise the platforms, then jump across to the columns in the water. Carefully jump to get the glyph. Fall into the water to return to the mainland.
Glyph 3: Located on rocks to the east of the second treasure stone. If you missed it, you’ll need to use the second ice super cannon.
Glyph 4: Located on the top of the hill, near the pressure plate which raises the platform to get to the first desert super cannon. You’ll find it when you build the second cannon on the desert island.
Glyph 5: On top of a sea stack, accessed via the updrafts. Rather than going through the tree trunk updraft (after the super trampoline), jump south off the cliff.
Glyph 6: Located through the arch to the east, after using the super trampoline. You’ll find it when you return the rudder to the raft.
Return to the Table of Contents
Do you like our content?
Support LadiesGamers as a member on Patreon!
 Or buy us a cup of coffee or tea on Ko-Fi!
![]()
Where are the last large fish on each type of island?
Hi there!
The Glintfish is found near the glyph (no. 3) on Fish-A-Lot Island, just to the left of the Whurtle’s head. The Glimmerfish is in Windy Cove on the upper level, near the carved stone slabs, in the area with lots of vine trees and the single ancient turret. Finally the Glossfish is just to the right of the tree with an updraught in it, near the final base camp on Gliding Tides.
Hope that helps. Lynne
I need help on one part of the game it gives you a fan and tells you to open the gate for the elevator where it has these boxes but I can’t figure out how to get the gate open
Hi Kelly, you don’t mention which level you are on, is it Gliding Tides? If so, you need to throw rocks into the gold boxes, and use the fan to blow them round to the pressure pad. There is a large rock to the left which you can break apart. The first pressure pad lowers the column, the second pressure pad opens the gate. I hope that helps and you are enjoying Survival Kids. Kind regards Lynne