

As you know, the saying here on LadiesGamers is that when we love a game, we try to make a guide! Several of us are playing Tales of the Shire: A The Lord of the Rings™ Game and enjoying it a lot. Our review of Tales of the Shire: A The Lord of the Rings™ Game is here, and though we have noticed this game gets a lot of negativity, we feel it deserves much better. So, we gave it an I Like it a Lot and we feel it’s time for a guide.
Tale of the Shire Guide – Table of Contents
This guide will get you started, as the basics of this simulation game are a bit different than is usual. The guide is based on the controls of the Nintendo Switch.
The Tales: Is Bywater a Village?
A Daily Routine
Shops in Tales of the Shire
Cooking in Tales of the Shire
Growing Crops
Fishing in Tales of the Shire
Foraging with the Lantern
The Tales: Is Bywater a Village?
At first, Tales of the Shire might come across as just another sim game, but when you’ve played a bit and have gotten used to seeing Hobbits in “real game life” you will see there’s much more to this game. At first though, it can feel like you’re only progressing slowly.
The progression happens while you complete “Tales”.
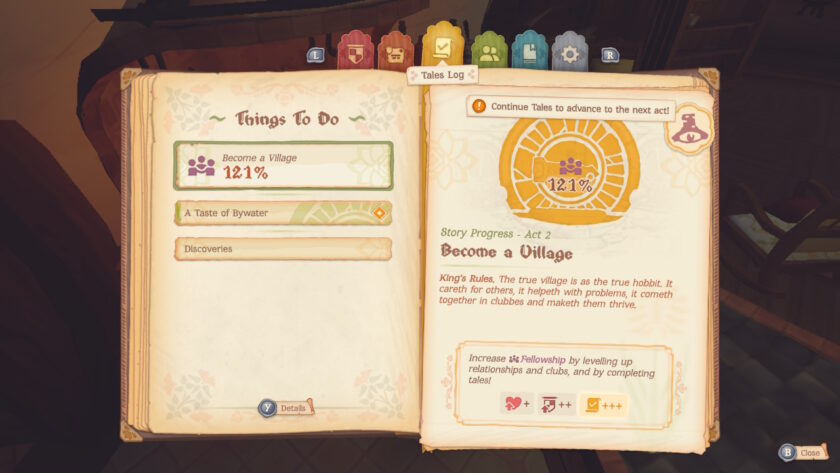
Bywater isn’t a Village
In Tales of the Shire, “Tales” are basically the game’s way of organising your progress and tasks, kind of like cozy little story arcs or chapters in your hobbit life. You can access them by pressing +. They are gentle milestones that guide you through the game’s narrative and help you deepen your relationships with the community.
As you make your way through Tales, you’ll unlock all sorts of handy things, new recipes, tools, and interactions. But it all begins with figuring out whether Bywater is officially a village or not. Your hobbit plays a big part in that process. Turns out, Bywater doesn’t quite qualify yet, so you’ll need to help the place grow and get things sorted before the assessor pops back over from Michel Delving to hopefully give it that official village status.
Fun little tidbit: Michel Delving’s basically the Shire’s capital. It’s the largest town, where the Mayor lives and kind of the go-to spot for all things proper and official!
How to turn Bywater into a Village
As soon as the intro is done, and it’s clear that Bywater isn’t a village, you get to work to do everything in your power to try to get it to that status. A main part of that is by unlocking the four main clubs: Cooking, Gardening, Fishing, and Foraging. Because a real village has clubs, right?

To make it work, you recruit members, appoint a leader and complete club requests that are posted at the Ivy Bush Inn. Doing so will eventually level up the clubs to improve Bywater’s reputation and unlock new perks.
Cooking Club – Lily Cotton She’s all about hearty feasts and perfecting the art of Hobbit hospitality. Expect warm smiles and even warmer pies and lots of recipes.
Fishing Club – Old Noakes A grumpy but lovable fisherman who lives under the stone bridge. He’ll teach you the ropes, and maybe toss in a few riddles while he’s at it.
Gardening Club – Rosie Cotton She’s passionate about companion planting and expanding your garden space. Her tasks often unlock new planter boxes and backyard paths.
Foraging Club – Delphi A nature-loving Hobbit who sends you out to gather mushrooms, berries, and other wild treats. Completing her tasks even upgrades your backpack size.
Return to the Table of Contents
A Daily Routine
It can feel overwhelming eventually, all the chores you need to do. Make a daily routine for yourself, which will make it easier to get all the things done that you want to.
Four Main Stages to Each Day
Each day has four main stages: morning, midday, evening, and night. Mornings are best for getting things done, like gathering supplies, foraging, or completing Tales.
You can use midday for the Shared Meals that you planned the day before, and when it’s evening you can potter in your garden and send out invites to the neighbours for a shared meal. Any time left can be spent fishing as the fish are a nice way to earn some coin.
As for nighttime? That’s your cue to get some rest. If you skip sleep, you might end up oversleeping the next day, which could mean missing out on a Shared Meal or something else important. And that can knock your fellowship score down a bit.
Check Your Mail Daily
You can check your mail in the mailbox in front of your Hobbit-hole, or at your writing desk. Best time to do this is first thing in the morning, because you will learn things that come in handy. Orlo, the Hobbit delivering the mail, will write to you about your fellow Hobbits to alert you that they are disappointed at not being invited by you for a Shared Meal. It’s important to pay heed to this, as otherwise it can lead to a Hobbit not accepting your invitations.
If you have extended invitations to a Shared Meal the night before, your guest will send their confirmation that they are coming. And, very important, they will add what kind of flavour or meal they would love to get. If possible, you can still whip up a fitting meal before the Shared Meal.

Shared Meals
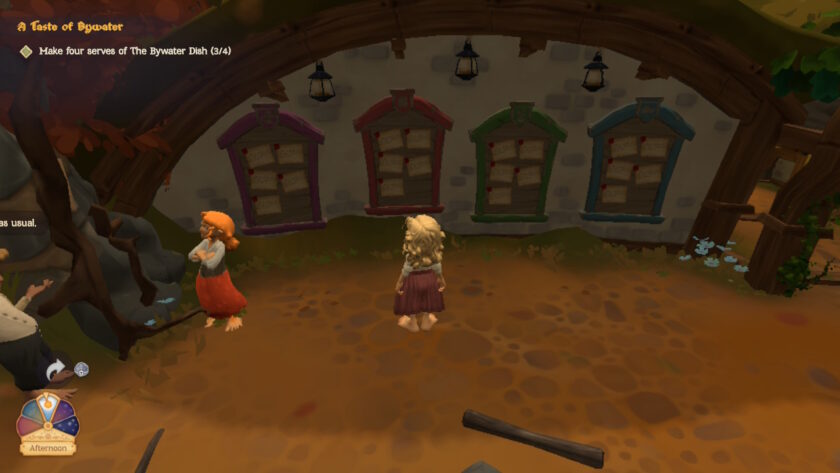
Tales of the Shire revolves around Shared Meals (and, of course, cooking them). Because of that it’s important to organise them as often as you can, though I found it’s easier said than done at first. You need a lot of ingredients for most meals, and getting flour and cream can really cost you.
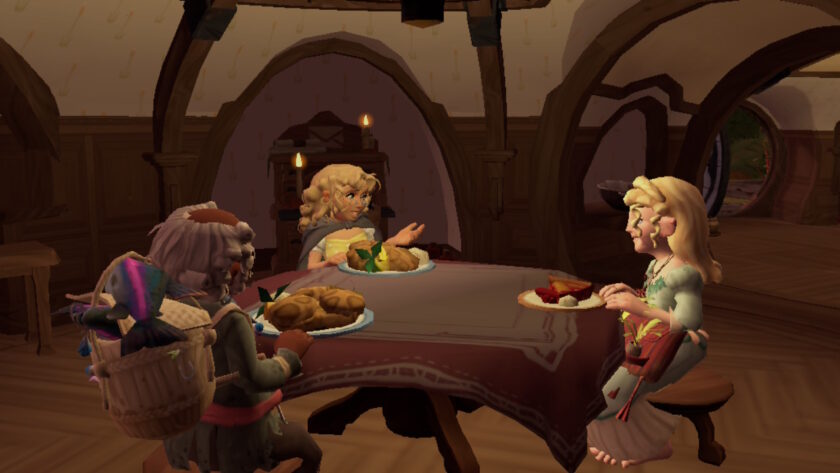
When the Hobbit you invited is happy with your meal and they level up their friendship, they will have a gift for you. Often a new recipe and later on customisations for your Hobbit-hole or new attire. It is a bit odd that you have to ask them for the gift after the meal, but there’s no other way to go about it.
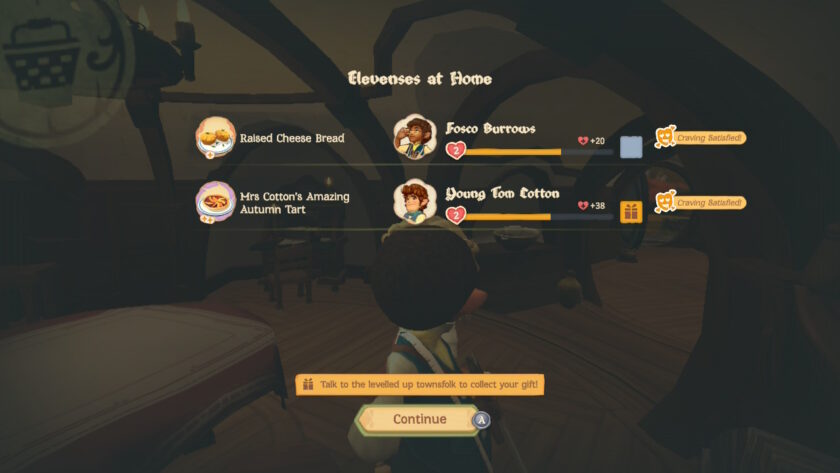
The better you get to know your fellow Hobbits, the more you’ll know about their preferences in the recipe menu. Which helps to serve them a fitting meal and get their affection up.
Return to the Table of Contents
Shops in Tales of the Shire
From early on, you need to know where you can buy ingredients, seeds and other things you need. Let’s take a look:
Farmer Cotton’s Stall – The Village Square
- Seeds (e.g. Brown Tater Seeds)
- Vegetables (although there isn’t a lot of choice)
- Garden beds, to expand your garden at home
Hobson Hornblowers’s Stall – The Village Square
- Seasonings
- Fruit

Young Tom Cotton’s Shop – The Village Square
Animal Products like:
- Meat
- Miscellaneous like:
– Cream
– Egg
– Milk
Sandyman’s Shop Inventory
Sandyman’s shop is tucked away northwest of the village square and The Green Dragon. If he’s not at the counter, you can ring the bell to summon him, even at night! He stocks grain and flour.
- Flour
- Barley
- Oats
- Yeast

Nefi (the Dwarf) at Nefi’s Forge
You can trade eggs with Nefi for a selection of meat and seasoning.
Willow Took’s Trading Post
Windfall Wood that you find in the forest → can be traded at Willow’s for various nuts like hazelnuts and walnuts.
Delphinium Brandybuck
When you forage things like mustard plants you can trade them with Delphi for jams.
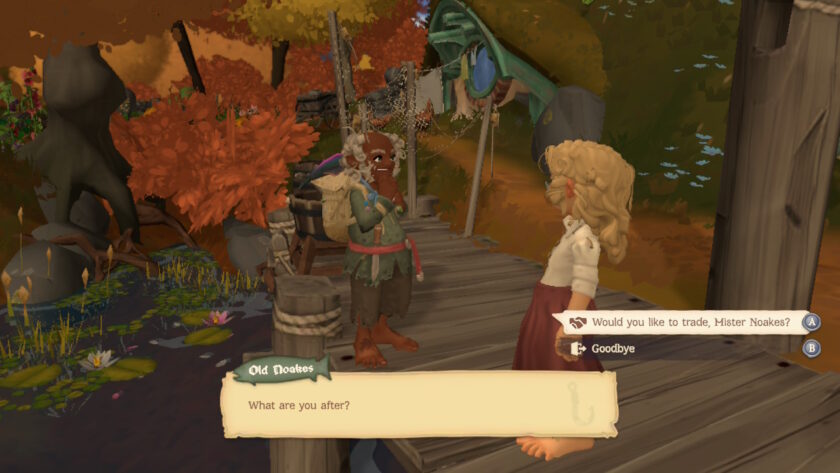
Old Noakes at his fishing dock
You get your Fishing Rod from him. You can bring him taters and trade them for a selection of fish.
Return to the Table of Contents
Cooking in Tales of the Shire
While most simulation games treat cooking as an extra on top of farming or crafting, for Tales of the Shire it’s the main thing the game revolves around. Preparation methods and the level of the ingredients that you use will have an effect on the taste of the dish and the quality of it.
Flavours in a Dish
When you look at the recipes you have gathered, every dish has either a pre-determined flavour, or an “uncertain flavour”. You can influence the taste a dish has when it’s done by the way of cooking, the kind of ingredients you add or by adding spices.
Aside from the uncertain flavour there are five core flavours, and a dish can also end up with a combination of the two. These flavours define your meal’s taste and their appeal to your hobbit friends. In brackets you see the colour of the little icon associated with the flavour:
- Sweet (Purple)
- Salty (Blue)
- Spicy (Red)
- Bitter (Grey)
- Sour (Green)

Follow the Recipe
The cooking itself starts fairly simple. You choose a recipe for which you have all ingredients, and it’s nice that you don’t have them all in your backpack. Everything in the pantry is accessible too.
Choose every ingredient you need, and notice that there are faded out circles on the right side of your screen. They fill up depending on the quality of the ingredients, and of course, the higher the quality the better.

Add the ingredients to the bowl. Some go straight in, others need to be chopped and others can be cooked first. At the start you have a frying pan for that, later on you get more options by fulfilling more quests in the Cooking Club. When you put them in the pan you can choose to add seasoning with Y (see the symbol on the top right of the screen). With that you can change the flavour of the dish.
Some ingredients will need chopping on the chopping board, and here is where it gets more intricate. Each dish has a perfect state for how fine things are chopped, or how long a dish is cooked. You can see it on the bottom right, the orange star that’s visible just under Smooth. If you get that just right, you’ll create a textured dish, which are of higher quality and satisfy your guests more.
Getting it just right is done by having the right level of chunky or smooth (chop more or less), or crips and tender (cook more or less).

Return to the Table of Contents
Growing Crops
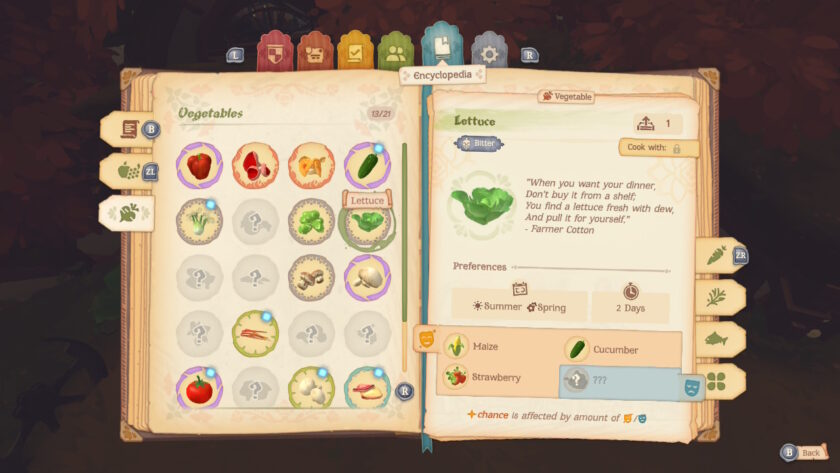
Aside from things you can forage, growing crops is very important. Growing them in Tales of the Shire isn’t just about planting and harvesting, there’s a star-based system that determines crop quality. Not all crops yield the same results, so if you want those prized three-star harvests, you’ll need to pay attention to your garden’s layout and the plants’ preferences.
Crops come in one-, two-, or three-star varieties, with higher stars meaning better quality. Unlike other farming games, there are no fertilisers or boosters to improve your yield. Instead, crop quality is entirely based on how happy the plant is in its environment. Of course, you’ll have to make sure to water the seeds daily too.
Companion Plants
Each crop has specific likes and dislikes when it comes to its neighbour plants. Some thrive when planted near certain types, while others wilt if placed next to incompatible companions and will give bad results.
To start planting, select X and go to the seeds you have available. Once you select a seed, it’ll show a ring on the ground of the planter, showing how much room it needs to grow. When you hover it next to a companion plant, it shows a yellow smiley icon, which means the crop is content with its surroundings. A purple sad face signals that the plant wouldn’t be happy there, nearby crops it dislikes. And some plants are loners and prefer space to themselves, so crowding them can lead to poor ratings.
Optimise the Use of the Planters
You can cram as many crops in a planter as possible by placing the seed at the edge of the planter: the ring doesn’t have to be entirely over the soil. Eventually, you will need more space. Visit Farmer Cotton in his stall in the village square to purchase garden beds in various sizes and shapes to accommodate your layout.

They aren’t cheap by the way, so what to do when the seasons change and a certain crop won’t yield anything anymore? The choice is yours: dig it out with the shovel you got early on in the game, or let the plant stay dormant till the right season and keep on taking up valuable space.
Return to the Table of Contents
Fishing in Tales of the Shire
Once you’ve got your fishing rod (you get it from Old Noakes in a quest), it’s time to find a good spot to cast your line. Old Noakes makes it clear he doesn’t want you to fish his pond, but Old Ruby’s Pond is very convenient near to your Hobbit-hole. Look out for circles in the water; that’s how you’ll know fish are nearby.
To get started, equip your rod by opening the tool wheel (press Up on the D-pad), then select the rod. Hold down the cast button (that’s A) to throw your line. Aim as close to the fish as you can.
Fish usually bite within seconds. When they do, press A to start reeling them in. Fish won’t come quietly, they’ll fight to swim away. Watch which direction they’re pulling and use your movement controls to drag them the opposite way holding RT. So if the fish darts north (up), press south (down) to counter it.
Keep an eye on the white circle indicator. As you apply tension, it’ll shift from white to orange, then red. If it stays red too long, the line will snap and the fish will get away. When it turns red, ease off the movement buttons to relax the line. After a brief pause, you can start reeling again.
Return to the Table of Contents
Foraging with the Lantern
You’ll gain access to the Lantern as part of your progression in foraging. Once you hit Level Two, the Lantern becomes available, opening up new possibilities for gathering resources that are exclusive to nighttime. You can access it by pressing Up on the D-pad and selecting the lantern.
The Lantern unlocks the ability to explore the world after dark and uncover hidden nighttime treasures. Dark areas become visible, making it much easier to spot rare forageables like Butterfly Cups, which often only appear at night.
I had hopes that it would also prolong the time that I could stay out after dark, but alas: I fell over while foraging from the sleep taking me, and Hobson had to bring me home again in his wheelbarrow.

Return to the Table of Contents
That’s it for this guide of Tales of the Shire: A The Lord of the Rings™ Game. I know that it might not be the best game graphically, but you’ll have fun with this simulation game anyway!
Do you like our content?
Support LadiesGamers as a member on Patreon!
 Or buy us a cup of coffee or tea on Ko-Fi!
![]()
Thank you for this very helpful guide!
You’re welcome, thank you for visiting LadiesGamers!