


I was honored to play the amazing visual novel/escape room game YOUR HOUSE, and I had a whole lot of fun playing it. I liked it so much that I decided to do a walkthrough of the game; I hope this walkthrough helps you to get to the end of this amazing puzzle game for yourself. As of the time of writing, there are no achievements, so it is not a 100% playthrough. It contains just the answers to the puzzles.
Chapter 1

Click on all the bolded words as they pop up: idiot, gullible, stupid, this, her best friend, of all days, and then open. This will give you access to a postcard and a key. Click on the postcard to flip it over and show the address. Grab the screen, dragging it to the left to show the key. Click the bottom right corner’s little page corner to move on. You will have to use that page corner to back out of menus for the remainder of the game.
Click the next bolded word, then use the mouse click-and-drag to force your eyes open. Make sure to click every bolded word going forward. Scroll to the bottom of the list and pull the arrow upward. Now that you have a good idea of how the game works, you can press through the rest of the prologue to the first puzzle.
The Running Puzzle
You’ll get a prompt saying you have “30 seconds to get to the fence and jump over it while the guard isn’t looking. Debbie runs.” When you click on runs, a whole bunch of the word runs will show up underneath it. You need to press all the bolded words in order, starting with the one you have already pressed, where it says “Debbie runs.”
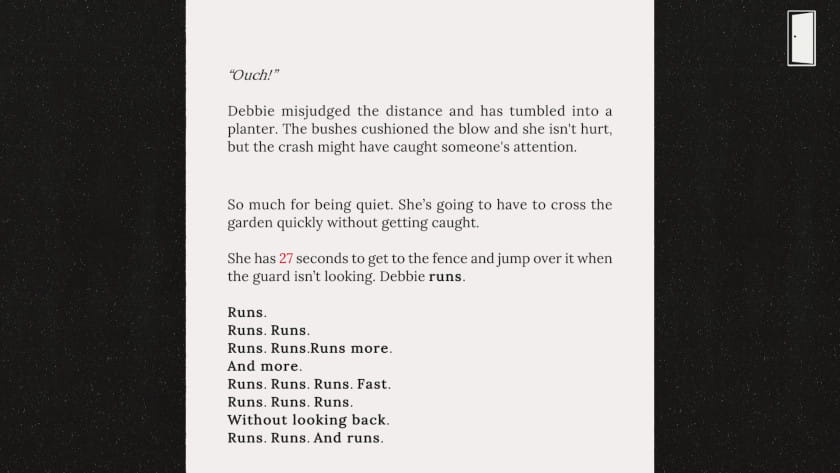
After getting through this, you will need to jump when the guard isn’t looking when the text is green.
Hotwiring the Bike Puzzle
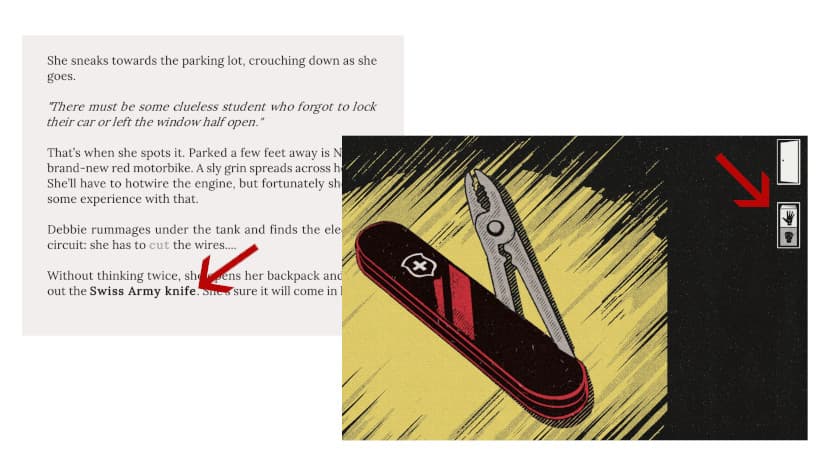
As Debbie sneaks through the parking lot, she’ll find a bike she wants to steal. You’ll need to first open up your Swiss Army Knife. Click on the bolded text that says Swiss Army Knife and click the tool twice until the wire cutter is visible. Then press the hand symbol on the right side of the screen.
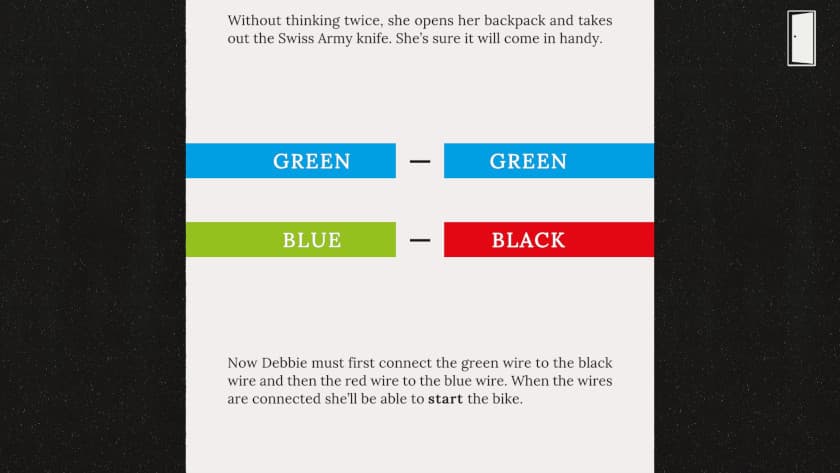
Next, you will see a bunch of wires. The colors will not match the color words on the wires. The solution requires that you match the words not the colors of the wires. For the top wire, you want the word GREEN on the left and the word BLACK on the right. For the bottom wire, you want it to say RED on the left and BLUE on the right. The press the bolded word “start.”
Should I Take the Interstate Highway or the Hicksville Freeway?
Once you are on the bike, you get the option to take the interstate or the freeway. No matter what you choose, it will get you where you need to go.
- Take the Hicksville Freeway, then stop for gas. Then you will be at your destination.
- Take the Interstate Highway.
- Choose to rest.
- Take the 86 to Norwick. Arrive at your destination.
- Take the back road to Pine Bluffs. Arrive at your destination
- Choose to keep going. Arrive at your destination.
- Choose to rest.
The Keypad Puzzle
Once you knock on the door a few times, you realize no one is home. Open your backpack using the bolded text and pull out the key. Use the bolded word key to put the key in the lock and unlock the pin pad to get into the house. If you press the red speaker button, a voice will tell you “Take a good look at what once came your way. The cars, birds and trees are the key to entering this place.” The voice is talking about the number of cars, number of birds, and number of trees on the postcard.
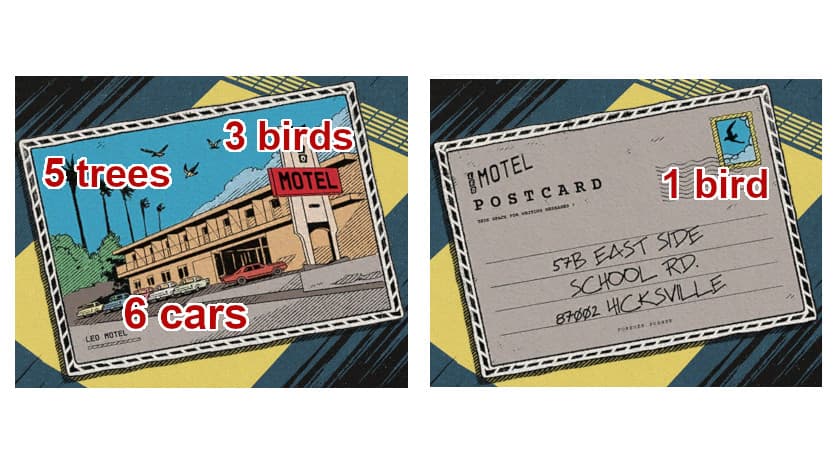
So the solution is six cars, four birds, and five trees. 6-4-5.
Chapter 2

The Shoe Radio Puzzle
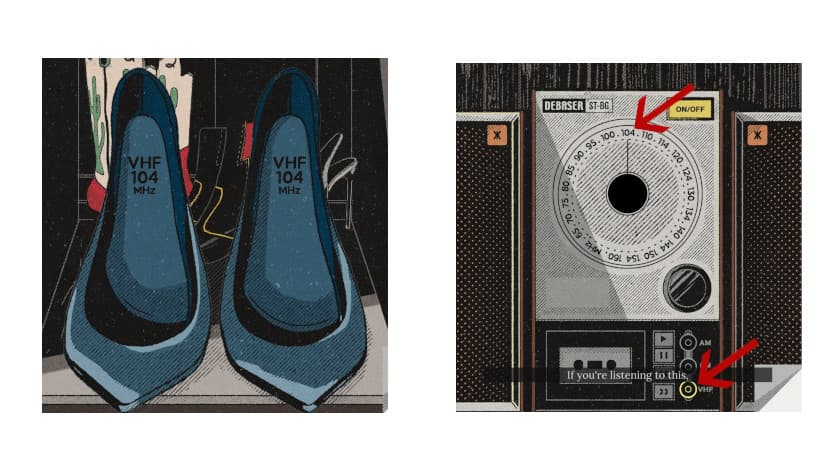
Early in Chapter 2, Debbie will hear knocking at the door, and she will find a book on the back porch. This book will be important for the rest of the playthrough. Head back to the dressing room upstairs and look at the shoes; they will have a code inside of them: VHF 104 MHz. Go back down to the living room and put this code into the radio. Press the VHF button in the bottom right, then turn the dial to 104. This will play a message.
The Radio Message Architect Puzzle
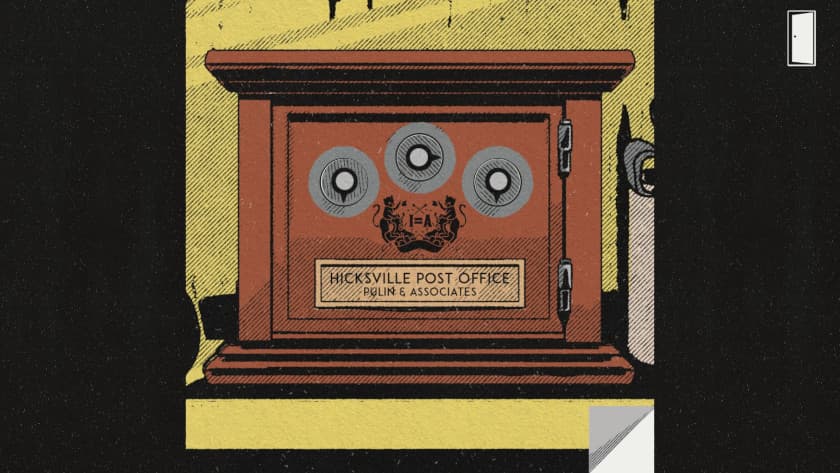
“If you’re listening to this, bear in mind that those motley architects with you, know how to open the shield box. Follow the path that leads from mustache to glasses, then to hat, and lastly to bow tie. Did you write those directions down?” So you need to head back to the stairs, then look for the man with the mustache, the man with the glasses, the lady with the hat, and the man with the bowtie. If you trace a path from one to the next, it goes down, right, down.

Go into the study and look at the Hicksville Post Office box. Turn the dials so they point down, right, and down in that order. This will open the post office box.
The Dressing Room Code
This will give you both the “View Master” and a piece of paper with holes cut in it. Drag the screen to the left, then click on the hand icon in the upper right to grab the paper and put it in the book on Page 51. Rotate it until you see the code in the holes of the paper.
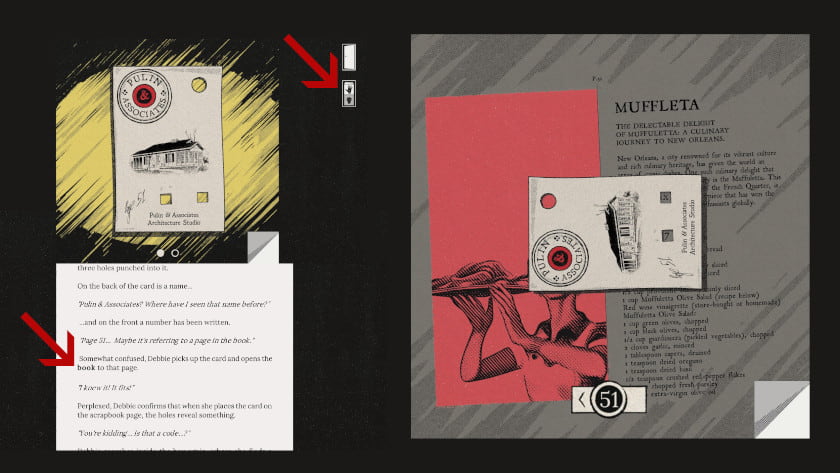
Head back to the dressing room and use the answer from page 51 to open the safe. You need to press the button seven times to get it to open. Inside will be slides, a measuring tape, and a calendar page. The slides will correlate to the Bathroom puzzle.
The Bathroom Wall Puzzle
Each of the slides has the name of a building, and half of these have a red X on them. Head to the bathroom and take the poster by the toilet down. This will give you a grid and another page in the book. The names of the places will correspond to the places on page 49 as instructed by the card hanging on the bathroom wall behind the picture.
The tile grid in the bathroom will be a 2×3 that you can push; you want to recreate the pattern of the red Xs on the bathroom wall by clicking the top right tile, the middle left tile, and the bottom right tile. This will open up the secret passage in the bathroom.
Chapter 3
The Books and Portrait Puzzle
Inside the secret room, there will be a bookshelf. Look closely at the numbers on the book and how they are related to the names of each of the books. Then, click on the portrait of Serena Pulin.
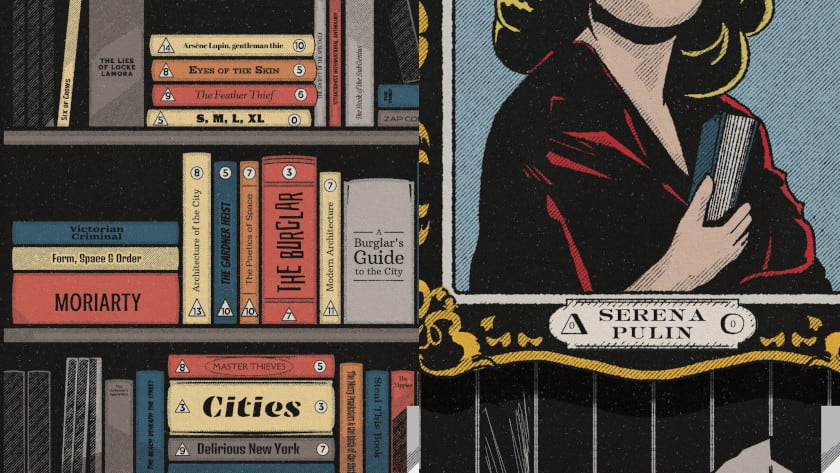
Similar to the titles of the books, you need to input the number of letters in her first name in the triangle and the number of letters in her last name in the circle. So put 6 into the triangle and 5 into the circle; you can only do this after looking at the books.
The Camera Room Locker
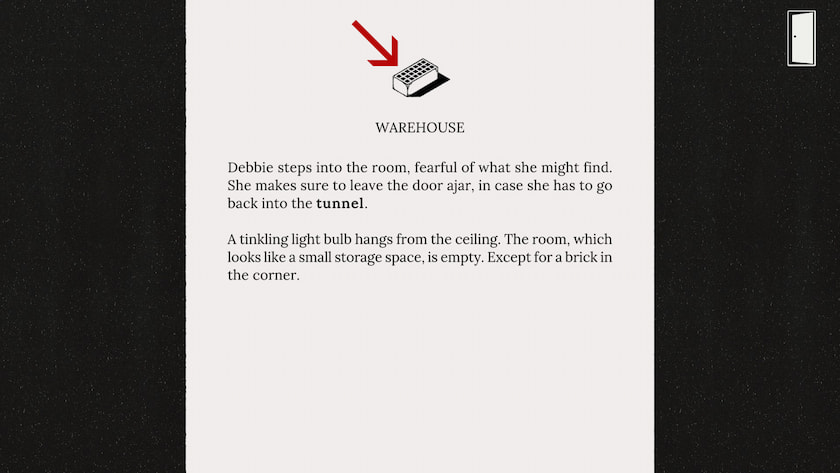
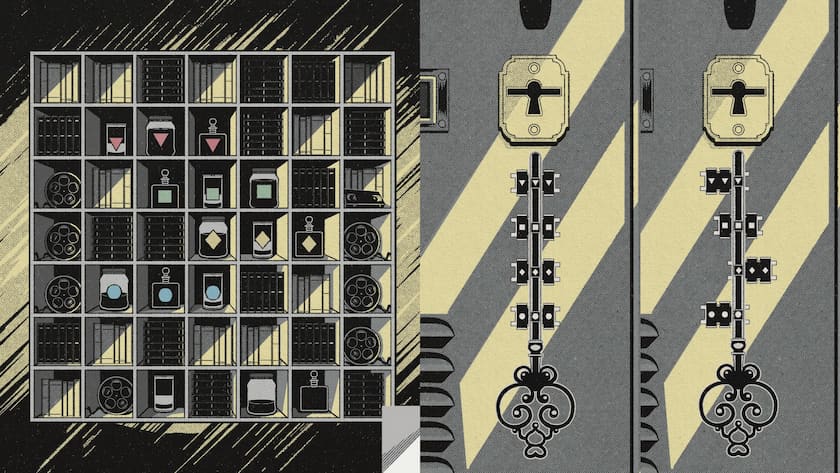
In this new secret space, you will find a switch to turn on and an open door. Go inside to find the camera room; there will be a locked locker and a shelf full of jars. Look around the camera room, then head back into the hallway to the second door. In the Warehouse, pick up the brick by clicking the brick at the top of the screen. There will be a key underneath it.
Pick up the key and take it back to the camera room. Then, look at the shelf. You want to match the jars on the shelf by clicking on the four teeth of the key so they line up. This will open up the locker. You will get a pair of glasses and a piece of paper from the locker.
Turning the Monitor on in the Camera Room
Put the glasses on to learn that these are night vision goggles that will give you a different perspective of the area if you look through them. You can turn the night vision on and off with the on/off switch on the right side of the screen. Go back into the warehouse and use the glasses on the wall; this will give you a secret message.
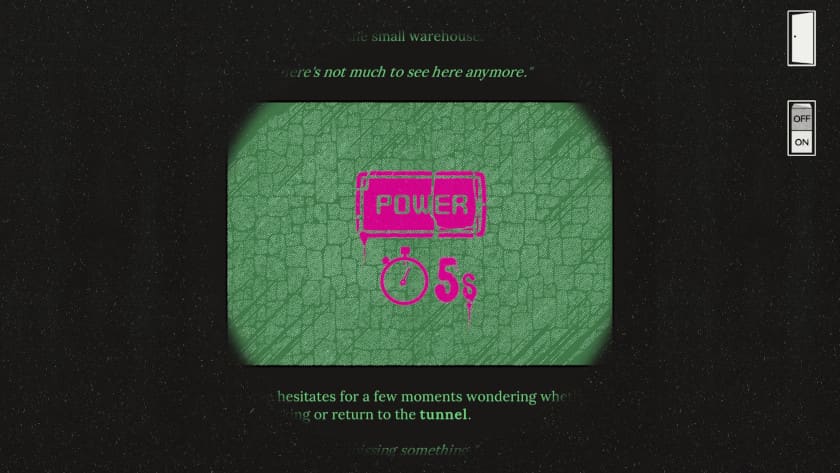
Go back to the camera room and hold the power button on the monitor for five seconds to turn it on. There will be a message on the screen for you that will unlock several more rooms in the underground tunnel.
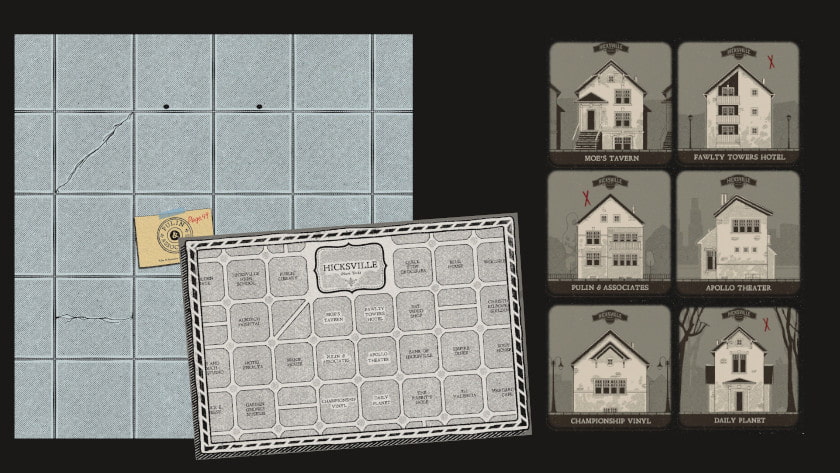
The Map for Chapter 3

Using the glasses on the map, you will see where the keys and the locks that you can match up by the symbols. There will be four different locks to unlock in this section of the game: the maple leaf, the rooster, the snake, and the face.
The Maple Leaf Lock Puzzle
At the top of the map, there is a Maple Leaf with the words “Channel 735” underneath it. If you head back to the camera room, you can type the number 735 into the monitor. This will show you the answer to the lock.
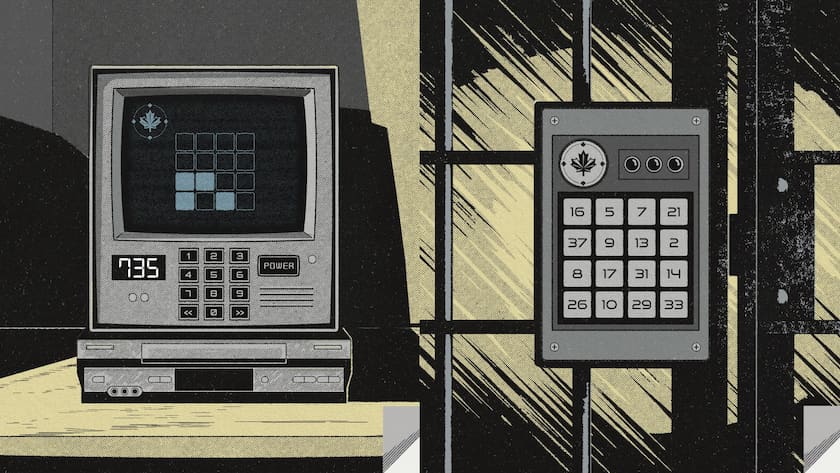
Head to the “Street” section of the underground tunnels and look at the keypad. Press 8, 17, 26, and 29 to open it up. This will lead you to the street’s parking meter, which is part of the answer for the snake lock.
The Snake Lock Puzzle
Now that you have access to the street parking meter, which is the lock for the snake puzzle, you can head back inside and go into the garage; and look at the fire extinguisher. This will have the answer for the parking meter puzzle.

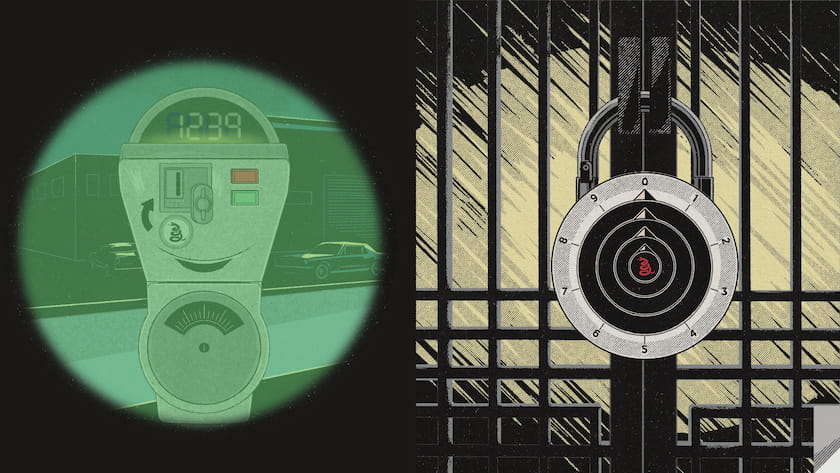
The answer to this one is the colors of the letters that show up with the glasses on the fire extinguisher in the order they show up. So on the parking meter, you need to press green, red, green, green, red, red, green. This will then light up the screen at the top of the parking meter. Look at this screen through the glasses to see the numbers you need.
The snake lock itself is located in the garden. Go into the garage from the tunnel, then to the garden, then select the door in the last paragraph. Input the four-number code into the door to unlock it. Click the outer circle until it points to the 1, then the second-largest to the number two, the third-largest to 3, and the smallest circle in the the center needs to point to 9.
The Rooster Lock Puzzle
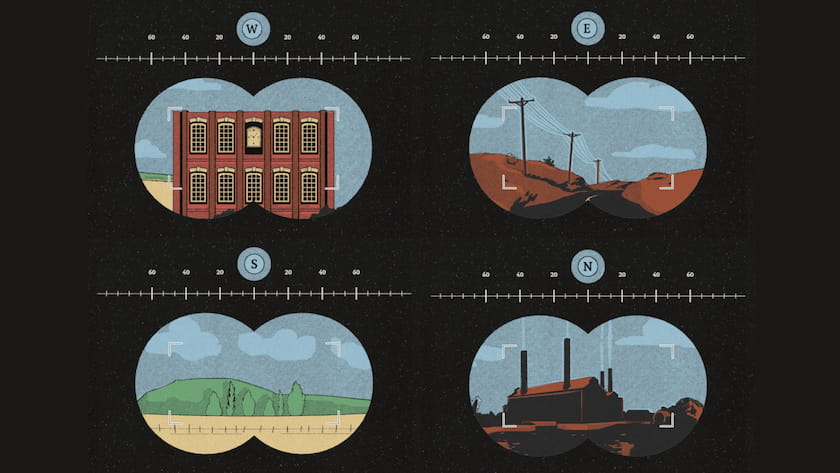
Once the snake puzzle is done, you will be able to access the answers to the rooster puzzle. The first hint will be in the binoculars. There will be four different directions and a rooster as the fifth one.
Back in the garden, you can find the second clue to the answer of the rooster lock. If you look at the lawn gnomes through the glasses, you will see that the pink letters spell NEWS. This correlates to the directions in the binoculars above. So the top hat first gnome is north, the angelic second gnome is east, the bowler hat gnome is third and west, and the beret gnome is fourth and south.
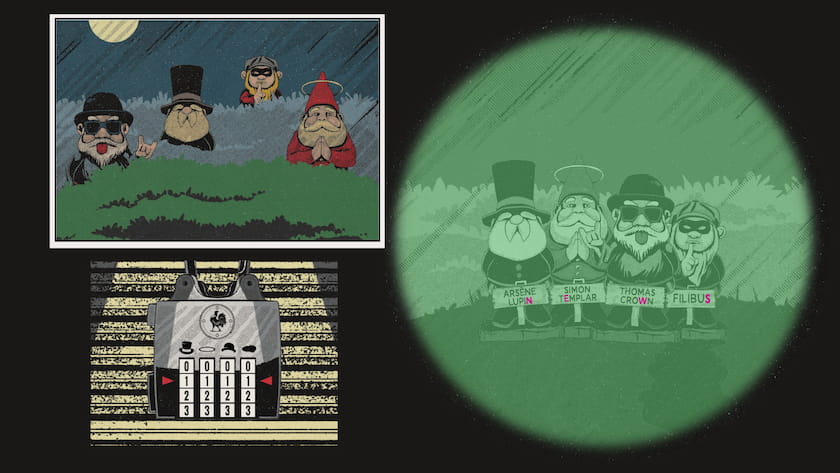
If you look back at the binoculars, the north has four smoke stacks, east has three power line utility poles, west has nine windows, and south has six bushes. The answer to the rooster lock, which is located in the door marked video store, is 4-3-9-6.
The Face Lock Puzzle to Get Into the Cabinet of Curiosities
If you click through the videos you can see in the video store now that it is unlocked. There are three tapes, and the final one is Irma Vep, which matches the face code in the upper right of the map when you are wearing the glasses.
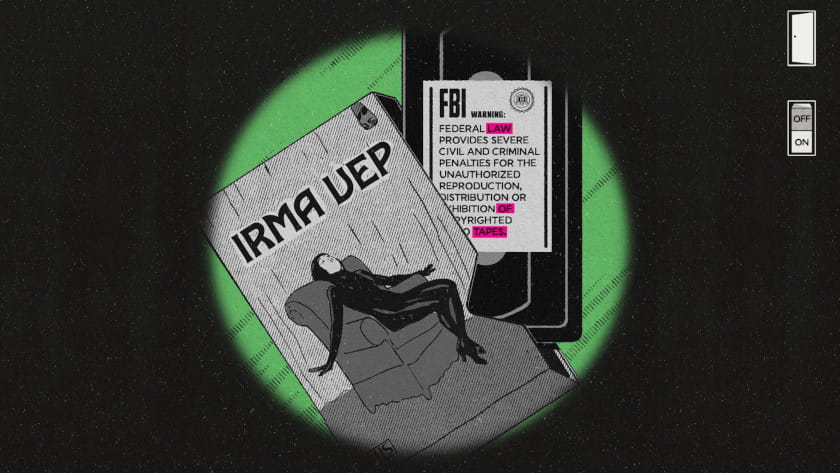
If you open up the video tape and look at it through the glasses, the words LAW, OF, and TAPES are all all highlighted. Law is three letters, of is two letters, and tapes is five letters. So head back to the camera room and type 3-2-5 into the monitor.
This will start up a voice message. “One Mexican on a bike. Another going up the stairs. One who is peeing. The one from before who is now telling his companions a joke. One after another. The “amigos” are the key to the treasure door.” Head to the Cabinet of Curiosities door. Look at the door through the glasses.
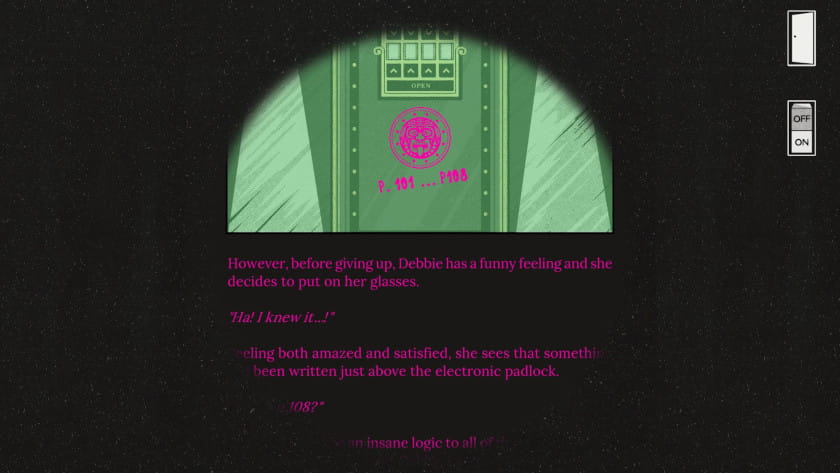
The text will now have a bolded word: book. This will open Debbie’s book to the pages notated on the door. Page 101 to 108 have the face symbol on them when you look through the glasses, and each has a letter highlighted as well. You need to find the four “amigos” mentioned by the voice message.
- One Mexican on a bike. (Page 102)
- Another going up the stairs. (Page 104)
- One who is peeing. (Page 101)
- The one from before who is now telling his companions a joke. (Page 106)
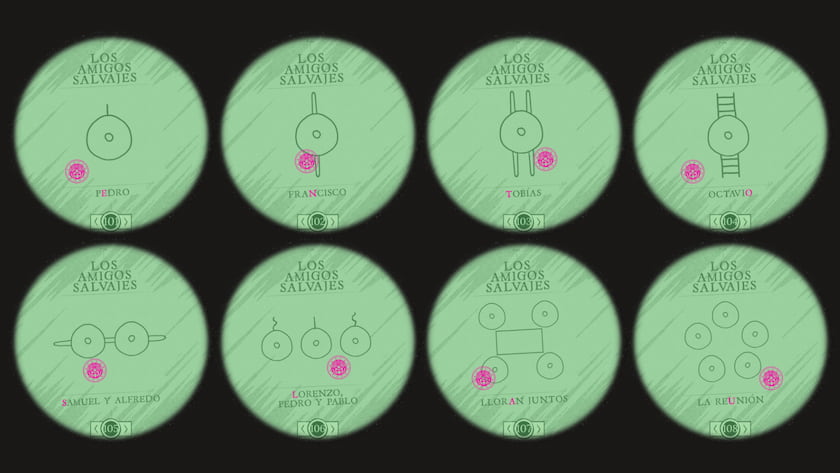
If you look at the highlighted letters on those four pages, it spells the word “NOEL.” Put the word NOEL into the Cabinet of Curiosities door and press the open button.
Chapter 4
The Cat Statue Puzzle
Take the cat statue with your name on it, and go into the study, then into the library. Put the cat statue in the holder in the library, then go back to the office to answer the phone. The woman on the phone tells you to bring all the cats together, and they will “give you the time to cry.”
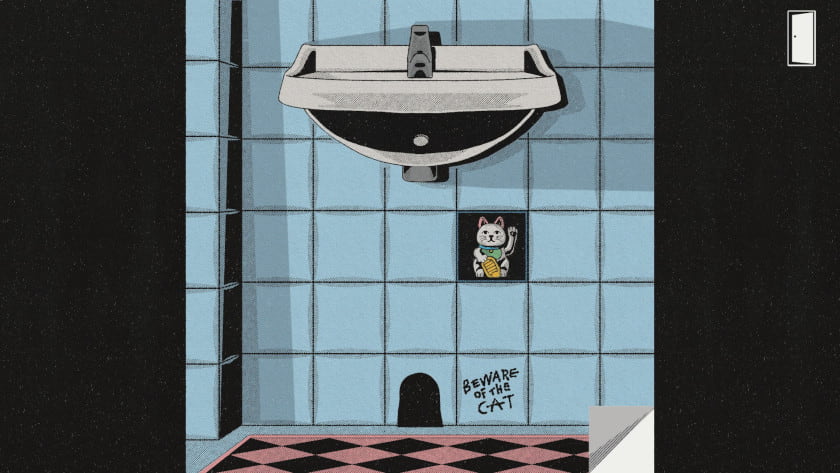
The First Cat
Go into the hall, then head into the bathroom. Click on the toilet paper at the top of the page, then press the tiles in the bathroom until you find the first cat.
The Second Cat
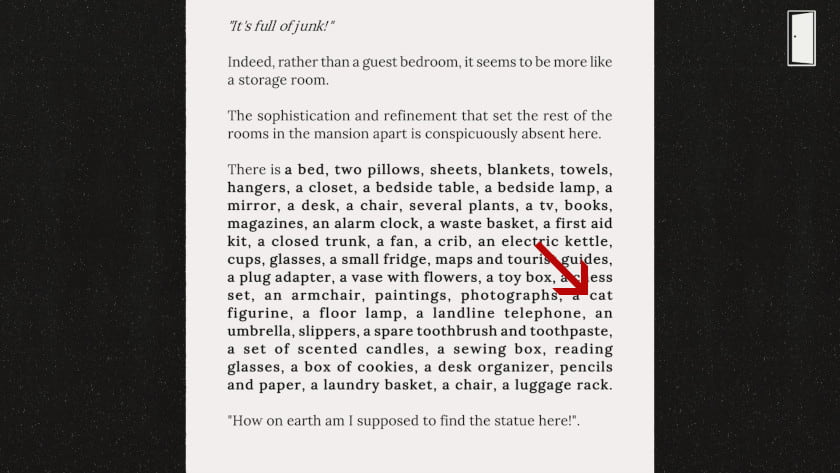
Go upstairs, then to the guest bedroom. There will be a list of items in this room, and a cat figurine is one of the many items you can find. Click on it to pick up the second cat figure.
The Third Cat
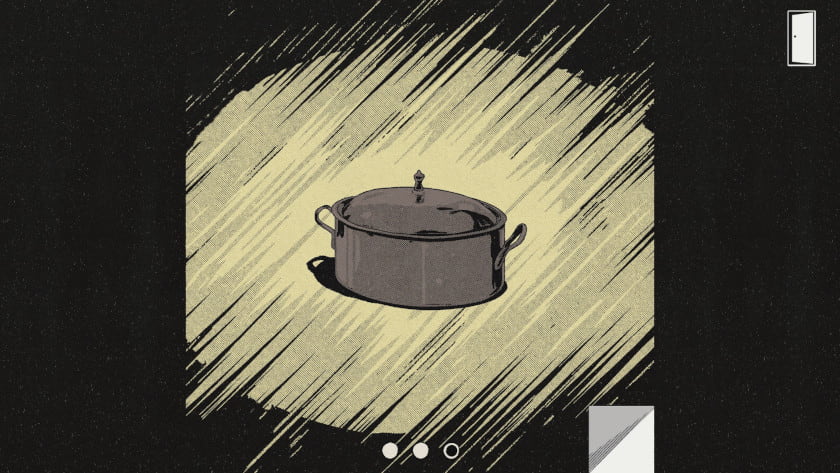
The final cat will be inside the kitchen which you can get to from the dining room. Click on the picture of the kitchen and look through the items you find there until you find a casserole dish. The cat will be inside this dish.
The Time To Cry Puzzle
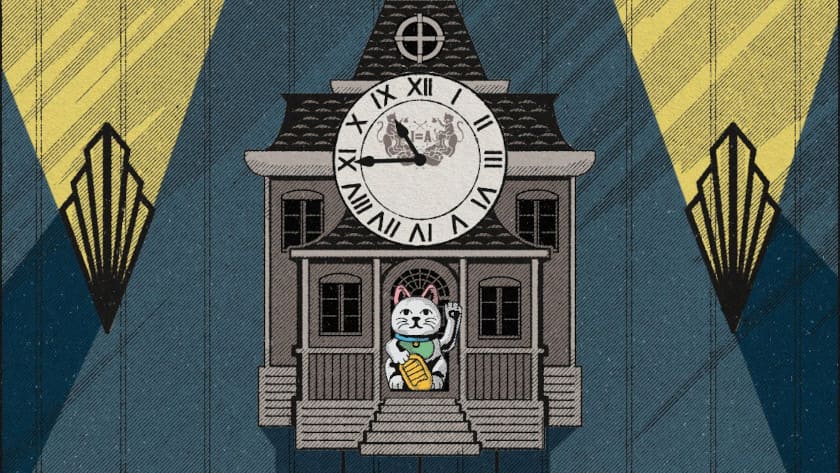
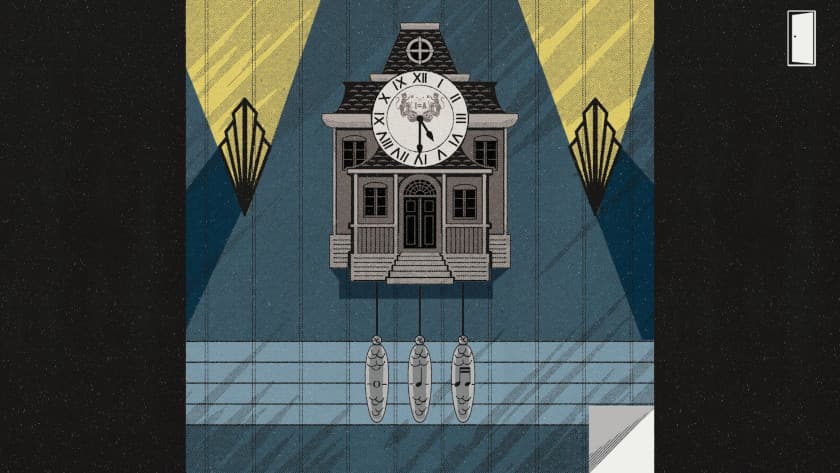
Now that you have the “time to cry” from the cats, which is 2345, go back into the dining room. Set the clock’s time to 11:45 by pointing the minute hand at the 9, and the hour hand at the 11. This will open the clock and show another cat.
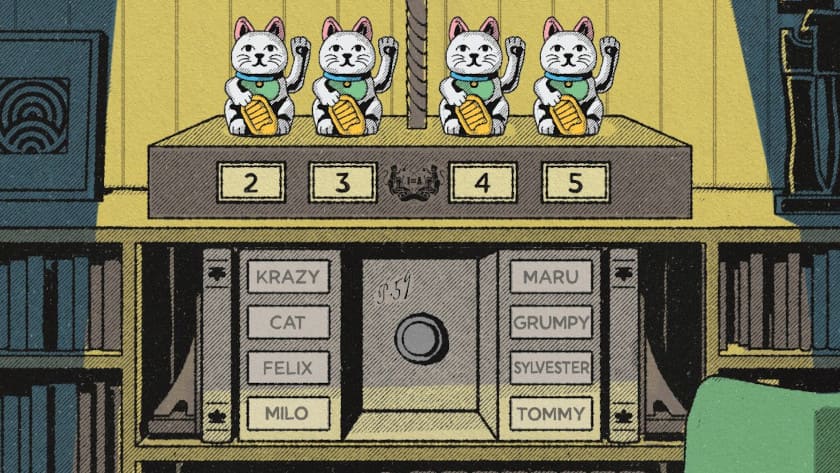
When this final cat appears, if you click on it, it will make five noises. The first is a bell sound, which you can ignore. The second, third, fourth, and fifth sounds are cat noises that correspond to the cat noises that the cat statues in the library make when you click on them. Recreate the noises on the cats in the library.
- The first meow is the cat above the number 3.
- The second meow is the cat above the number 5.
- The third meow is the cat above the number 2.
- The fourth meow is the cat above the number 4.
- Press those cats in the right order in the library, 3-5-2-4, and it will open up the bookshelf below the cats.
Dial Your Phone Puzzle
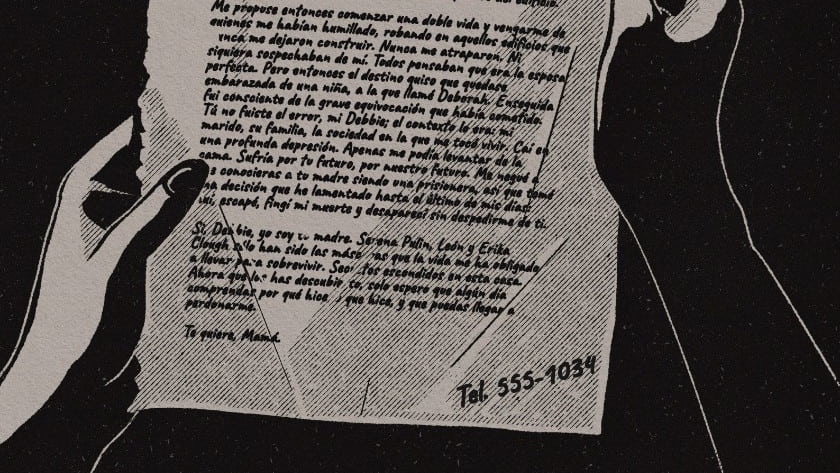
In the back of the safe underneath the cats, there is a note that says “P. 59.” Open up the book and look at page 59; it will show a woman on a phone.
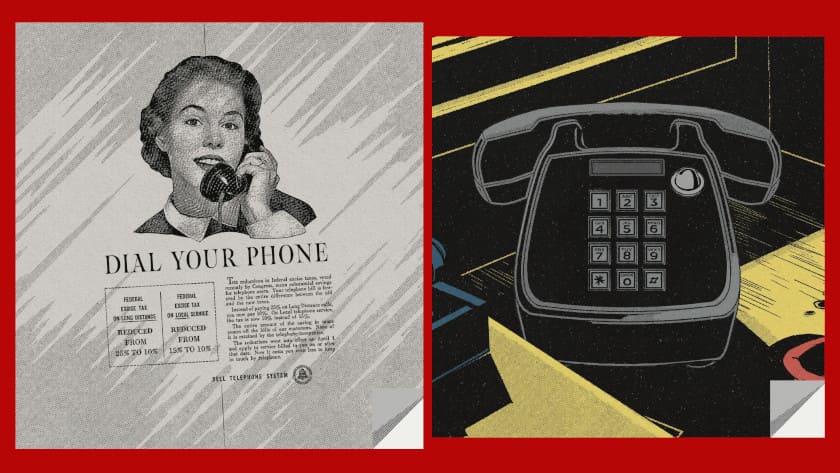
Head the office where the phone is and dial “YOUR PHONE” into the phone, which is 968-774-663. This will start another message that will teach you how to find all the cats’ names to open the safe below the cat statues.
NOTE: This is the only location I found that worked to put the phone number you get at the end of the game. You can put this number in if you have it. I have included the phone number at the end of this article, but you should note that if you do this early, it will spoil some stuff in the later part of the playthrough.
“Now that you’ve found my cats, you have to figure out their names. Carefully count how long the red lamp is on, and open the drawer. There you’ll find something that will shed light and help you search for the kitten’s names as well as discover the secrets hidden in this house.” Go into the hall, and pull the light cord on the lamp and count how many seconds the light remains on. Hold the red button for the same amount of time. This will open the drawer; pick up the key and the flashlight from the drawer.
In the Basement
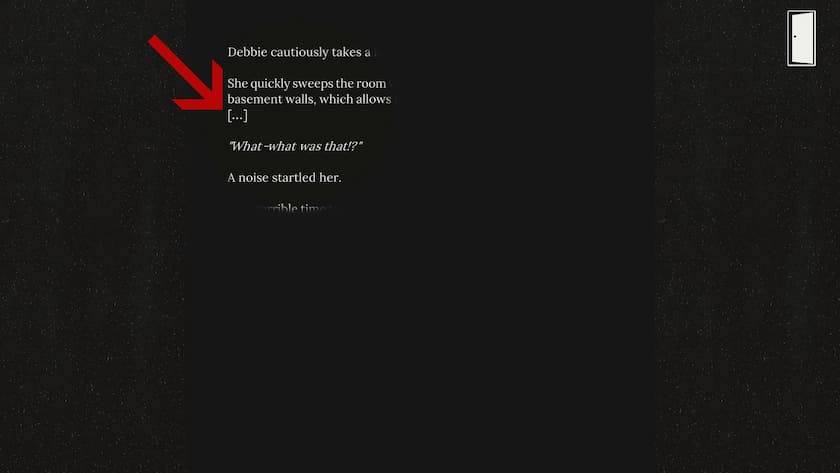
First, go downstairs into the basement. Press the […] in the text to get more options.
Note: There is an option to look at some wine bottles here in the winery, but I haven’t found any puzzles that these correspond to. I think they are left over from something that no longer exists in the game.
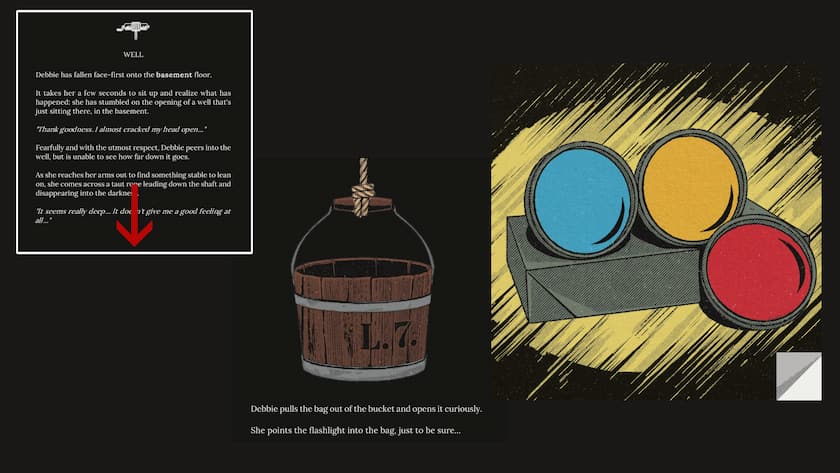
Then click that Debbie trips over something. It’s a well. Once you reach the well page, scroll down and keep scrolling down until you find the bucket. Click on the bucket to get the lenses.
The Pillows and Cat Names Puzzle
Go to the pillows in the living room and use the flashlight with the lenses on all the pillows. It will give you three of the four cat names. Sylvester, M, Grumpy. There are are two M names, so you don’t have enough information to figure out the four cat names. The fourth cat name will be in the attic, which you have the key for now that you have opened the drawer in the hall.
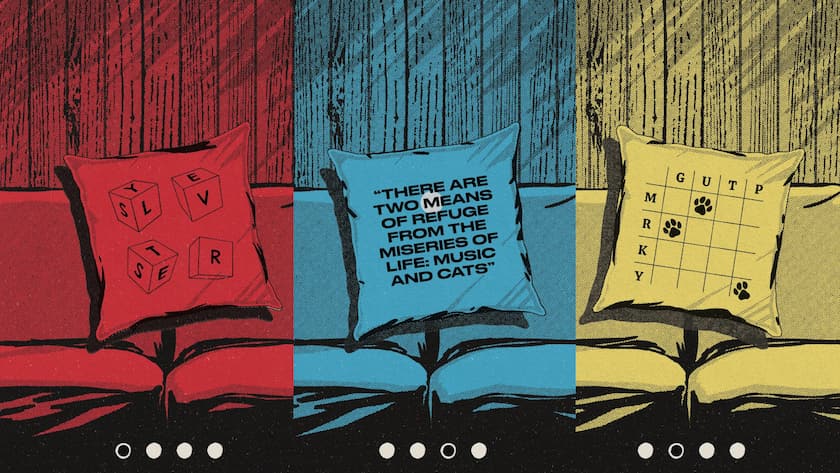
The key you got will open up the attic. On the fourth pillow is an X, so you want to make an X in the sky. The window across the street will show lights that spell out the fourth cat’s name.
It spells C-A-T. So the four cats names are Cat, Grumpy, Sylvester, and the last name starts with an M. Go back to the library, then put in the three names you know and one of the M names. You’ll find that the fourth name is Maru. This will open up the safe below the cat statues.
Chapter 5

The Clock Puzzle in the Dining Room
At the beginning of Chapter 5, you will be in the dining room. The text will read that the clock struck 5:30. Turn the clock hands so it reads 5:30 to move to the next text.
You will start a segment where you are running from a man in your house from room to room; keep clicking the bolded words until you pull the cable on the light. Then it will start a minigame where you have to click the word HERE to throw an object. Then you need to click RUN when it lights up green. Next, you need to press BITE and hold it until the scream fills all the way up; the word bite will move around, so you need to move the mouse as well.
This will break the picture frame of Erica, and inside will be a picture of a piano with P.23 and a key.
Records Puzzle Inside the Piano Room
Click on the bolded words pulls out to pull out a selection of records. Each of the three has some letters that have been highlighted with yellow diamonds. These will correspond to the letters on the record player, which can be interacted with by clicking on the final picture in the piano room.
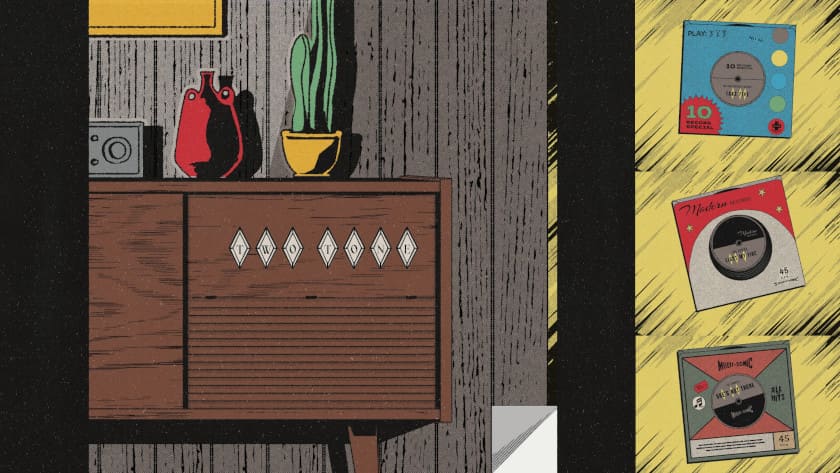
The letters on the record player, which spell TWO TONE, are all buttons that can be pressed. In order to solve this one, look closely at the highlighted letters: there are two letters in the name of the song, then a highlighted letter, unhighlighted, highlighted, unhighlighted, highlighted. This means you want to press the third, fifth, and last buttons: the first O, the second O, and the E. This way it will match the patterns on the letters of the record names. This will give you more slides for your View Finder.
The View Finder Clock Piano Puzzle
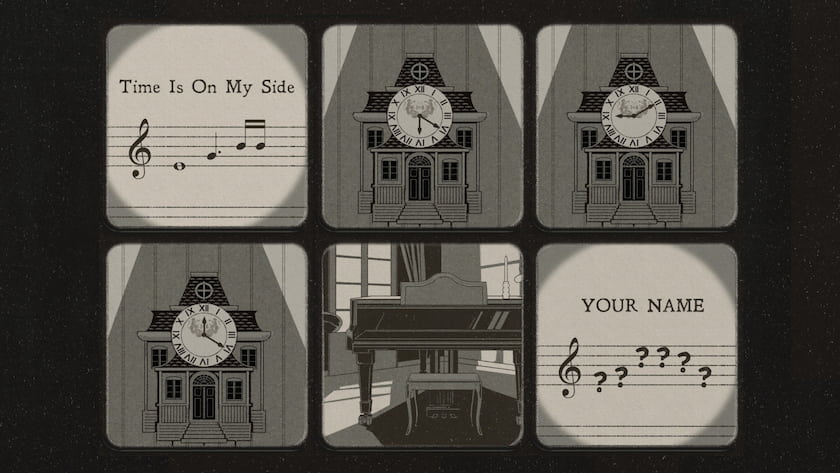
Once you have picked up the View Finder from the Dining Room, you will be able to look at all the new pictures you have. The first will be a song titled Time is On My Side; you can recreate this song in the dining room on the clock.
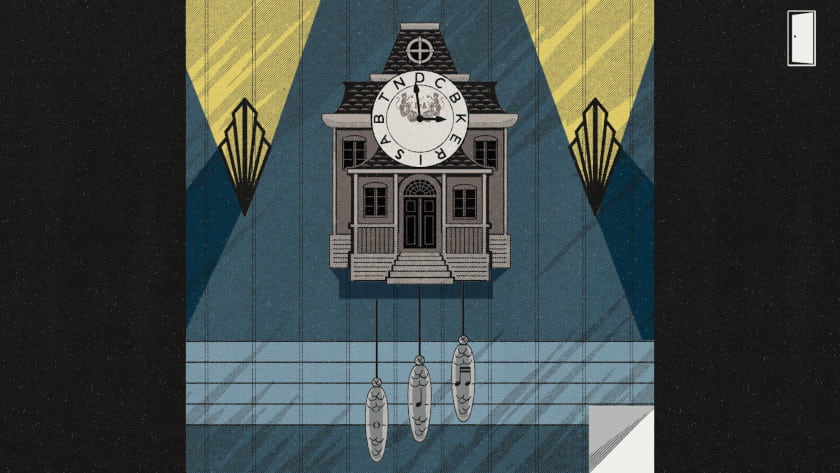
Once you move the weights so the notes are on the same lines as they are in the slide titled Time is On My Side, the clock face will change to display the letters associated with the times in the View Finder slides. These will spell out your name: D-E-B-B-I-E. It’s pretty obvious that the clue wants you to play your name on the piano, but I is not a note you can play on the piano. However, the house has been giving you the clues to find this answer since the beginning. The clock face in the dining room, the note by the phone, and several other locations around the house have a little note saying I = A. And it’s finally useful.
Go the piano and play D-E-B-B-A-E. This will give you access to a new page in the book; this one will reference the poster that is up on the wall.
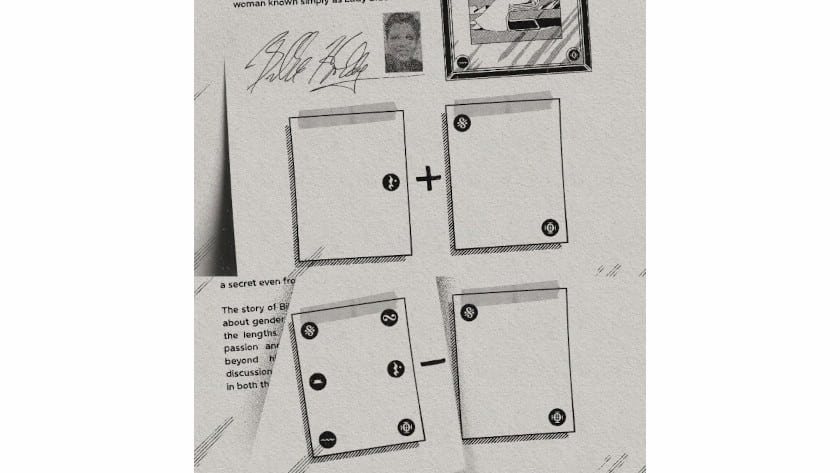
Press the top right button, both the left and right middle buttons, and the bottom left button to match the flipped page’s buttons. This will open up the area behind the poster.
The Piano Numbers Puzzle
Now that you have access to the three songs of the piano, you can play them all by pressing the number of the song and then the PLAY button. I’m not sure if this code changes between playthroughs, so here is a sample of what the three songs can have as notes:
- E-F-D-B-A-C-D
- E-C-A-B-D-F-E
- B-A-C-D-F-E
If you take each of these notes and trace them in the safe behind the poster, you will form three numbers that will give you the code to the safe.
E-F-D-B-A-C-D forms:
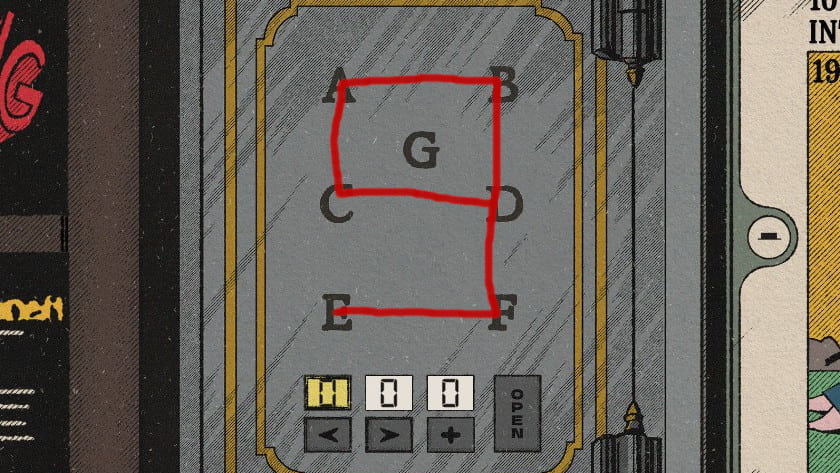
E-C-A-B-D-F-E forms:
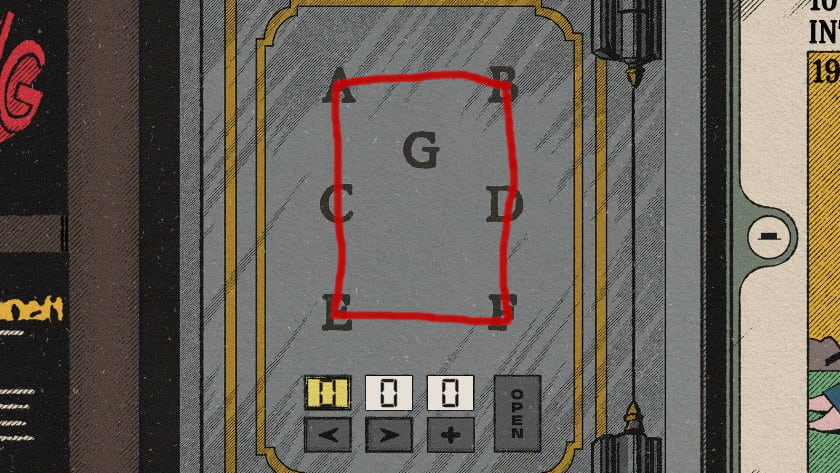
And B-A-C-D-F-E makes:

So the code for this one would be 905. As I stated above, this code might differ in your playthrough; I think this one might change.
Do you like our content?
Support LadiesGamers as a member on Patreon!
 Or buy us a cup of coffee or tea on Ko-Fi!
![]()
The bottles of wine relate to Maru’s name apparently.